
This 4-ingredient depression era cornstarch pudding is the kind of no-bake miracle my great-grandmother Helen leaned on when the grocery budget was stretched thin. It turns a few pantry staples—milk, sugar, cornstarch, and vanilla—into a thick, glossy, spoonable dessert that chills beautifully in a simple glass casserole dish.
Recipes like this were common during the Depression, when eggs and cream were luxuries, but families still craved something sweet and comforting. Served cold on a hot afternoon, it’s proof that you don’t need much to make something memorable.
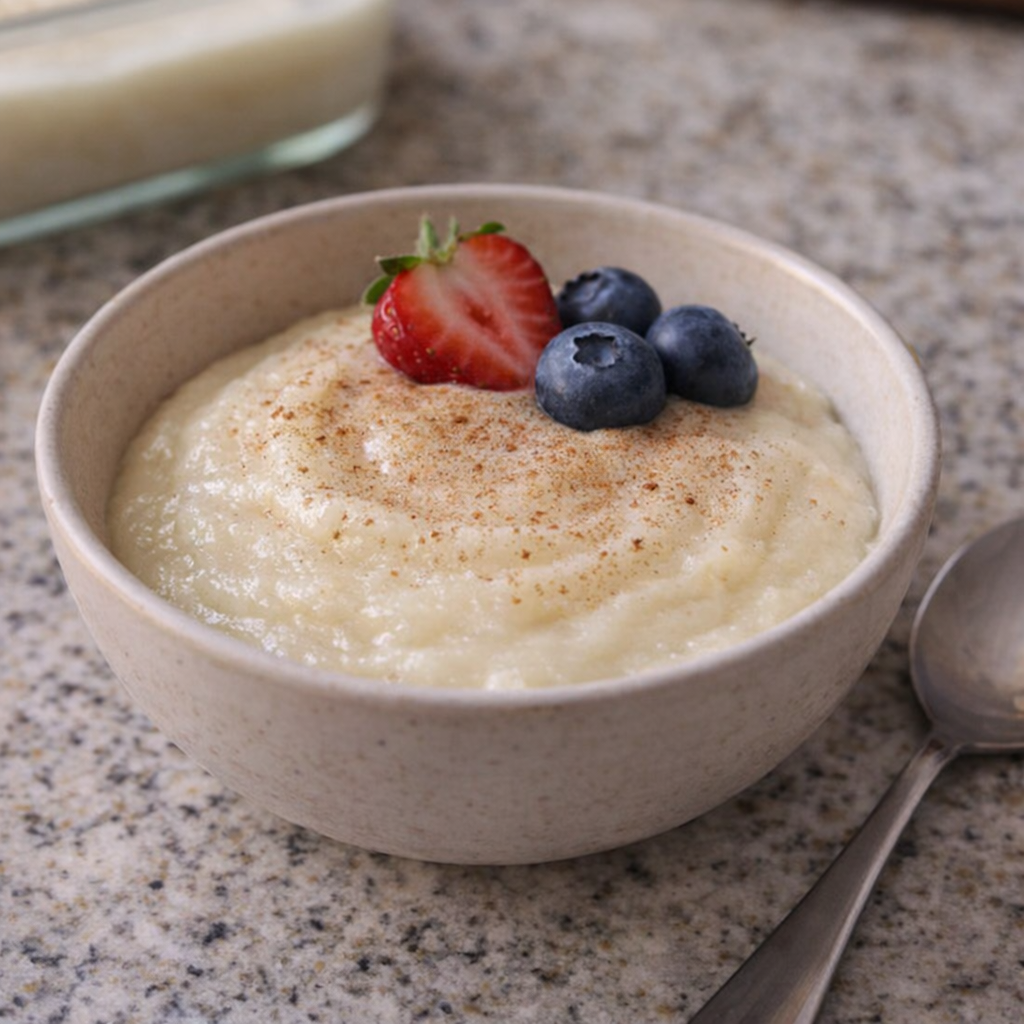
Serve this pudding well-chilled, straight from the glass casserole dish, with simple toppings that fit the spirit of the recipe: a sprinkle of cinnamon, a dusting of cocoa powder, or a few fresh berries if you have them. It pairs nicely with hot coffee or iced tea, and works as a light dessert after a simple weeknight dinner.
You can also spoon it into small bowls or ramekins for individual servings, or layer it with crumbled plain cookies for a humble parfait that still feels special.
4-Ingredient Cornstarch Pudding
Servings: 6
Ingredients
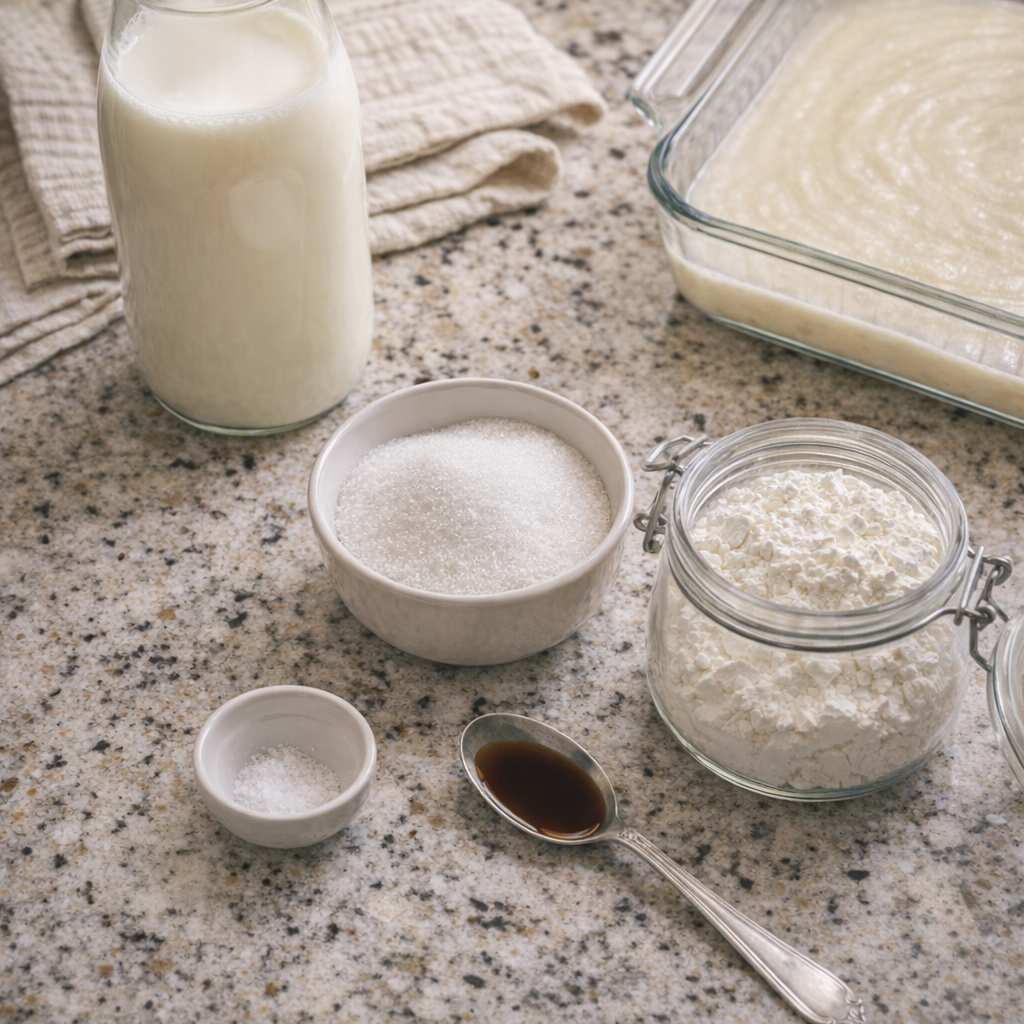
4 cups whole milk (or any milk you have on hand)
1 cup granulated sugar
1/2 cup cornstarch
2 teaspoons vanilla extract
Pinch of salt (optional, but enhances flavor)
Directions
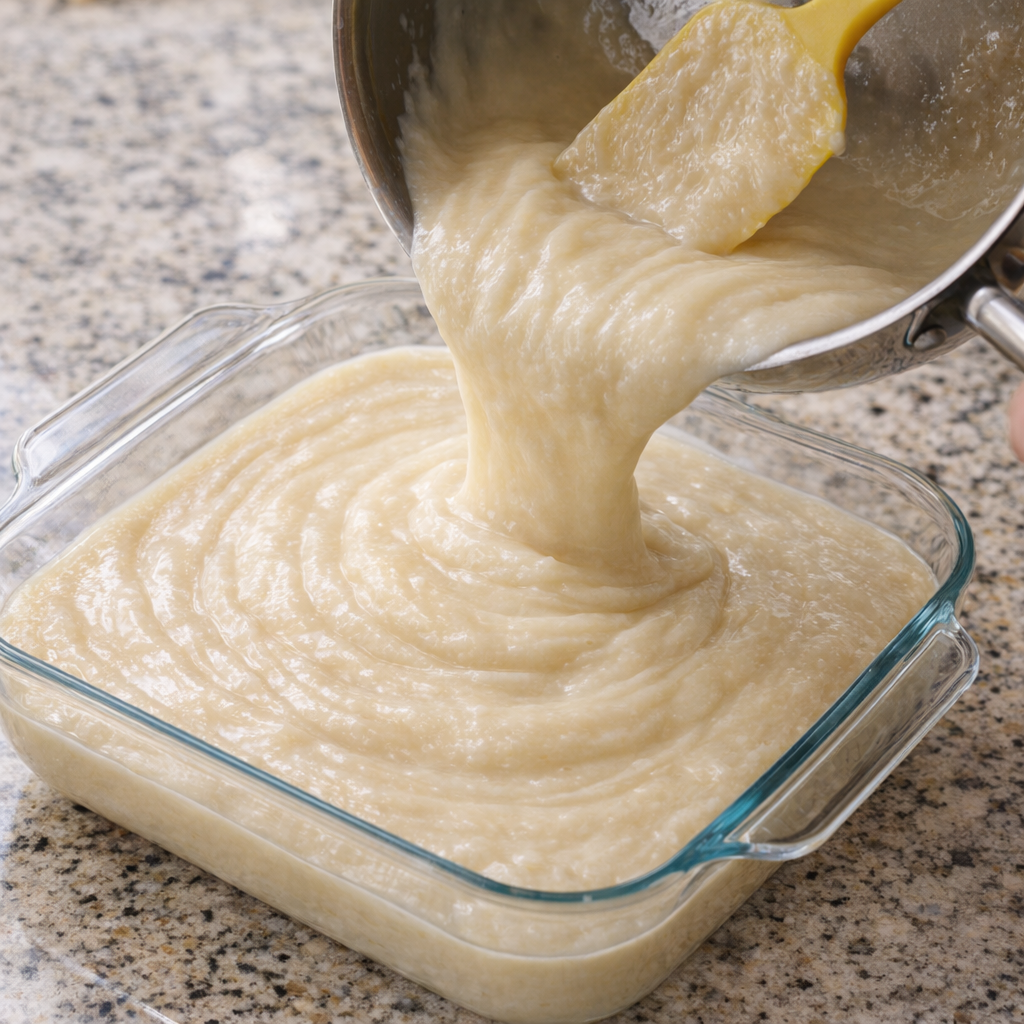
Lightly rinse or wipe out a medium glass casserole dish (about 8x8 inches or similar) and set it on a heat-safe surface where it can cool undisturbed. This will be your serving dish, just like Great-grandmother Helen used.
In a medium saucepan (off the heat), whisk together the sugar, cornstarch, and pinch of salt until no lumps of cornstarch remain. This dry mixing step helps prevent clumping later.
Slowly pour in about 1 cup of the milk while whisking constantly to form a smooth paste. Once the mixture is completely smooth, whisk in the remaining 3 cups of milk until fully combined.
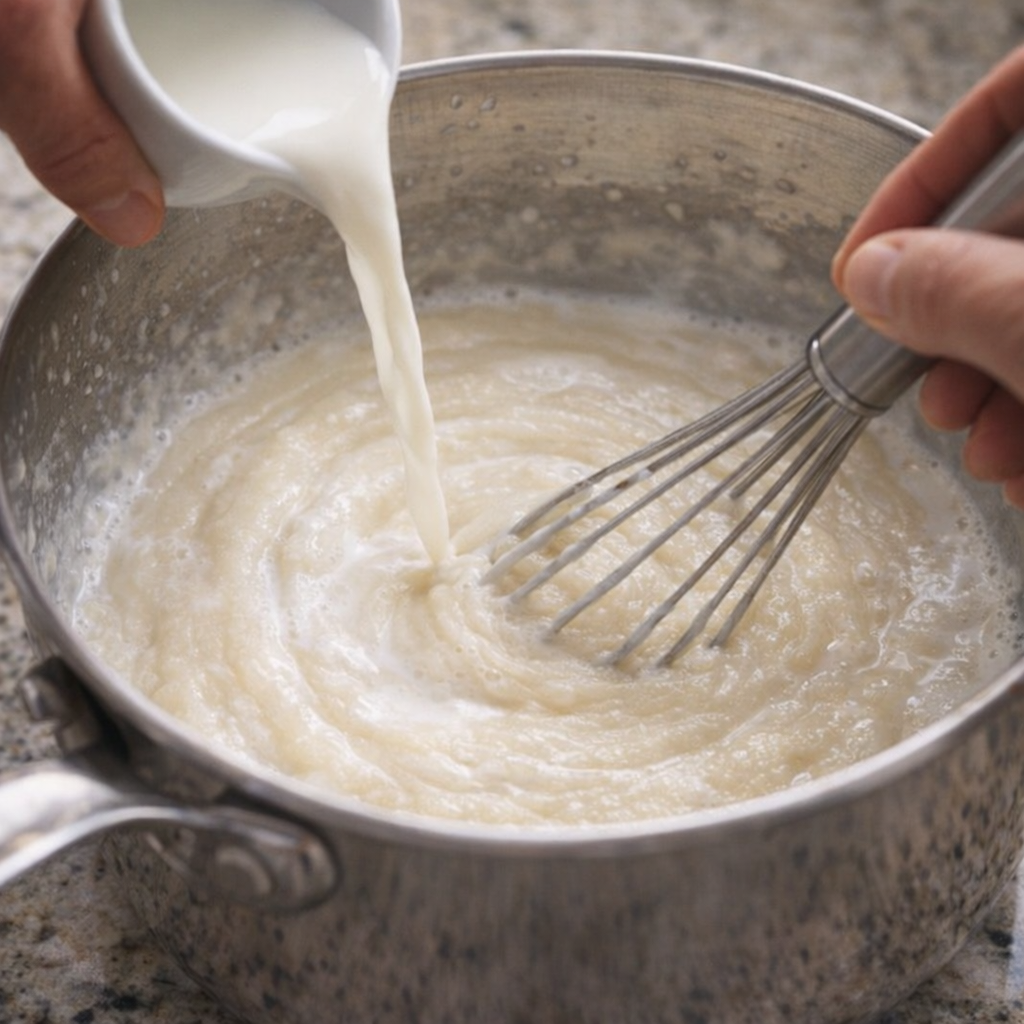
Place the saucepan over medium heat and cook, whisking frequently at first and more constantly as it warms. Scrape along the bottom and corners of the pan with the whisk or a heatproof spatula to keep the mixture from sticking or scorching.
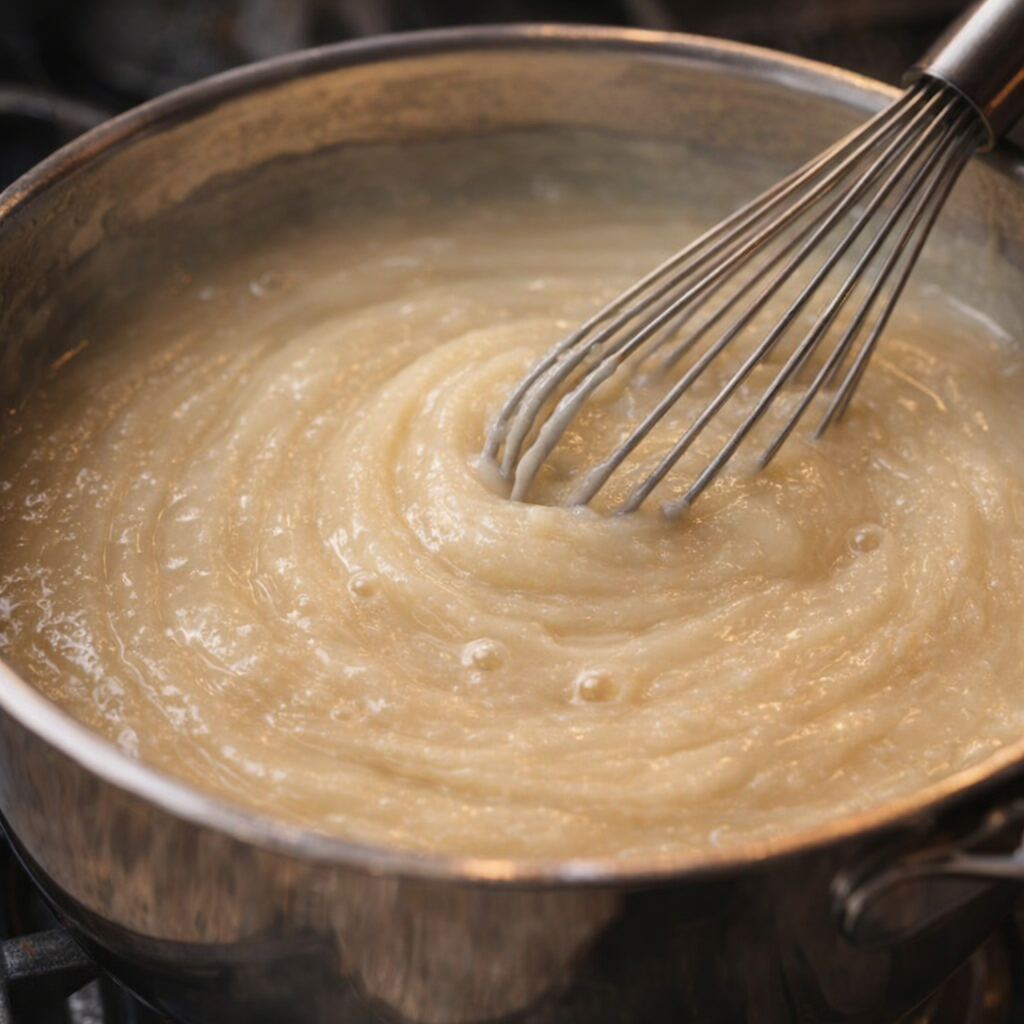
Continue cooking until the pudding thickens and begins to bubble. Once it reaches a gentle simmer, cook for another 1–2 minutes, whisking constantly, until it is thick, glossy, and leaves clear trails when you run a spoon through it. It should be noticeably thicker than a sauce—remember it will firm up more as it chills.
Remove the saucepan from the heat and immediately whisk in the vanilla extract. Taste carefully (it will be hot) and adjust with a tiny pinch more salt if needed to balance the sweetness.
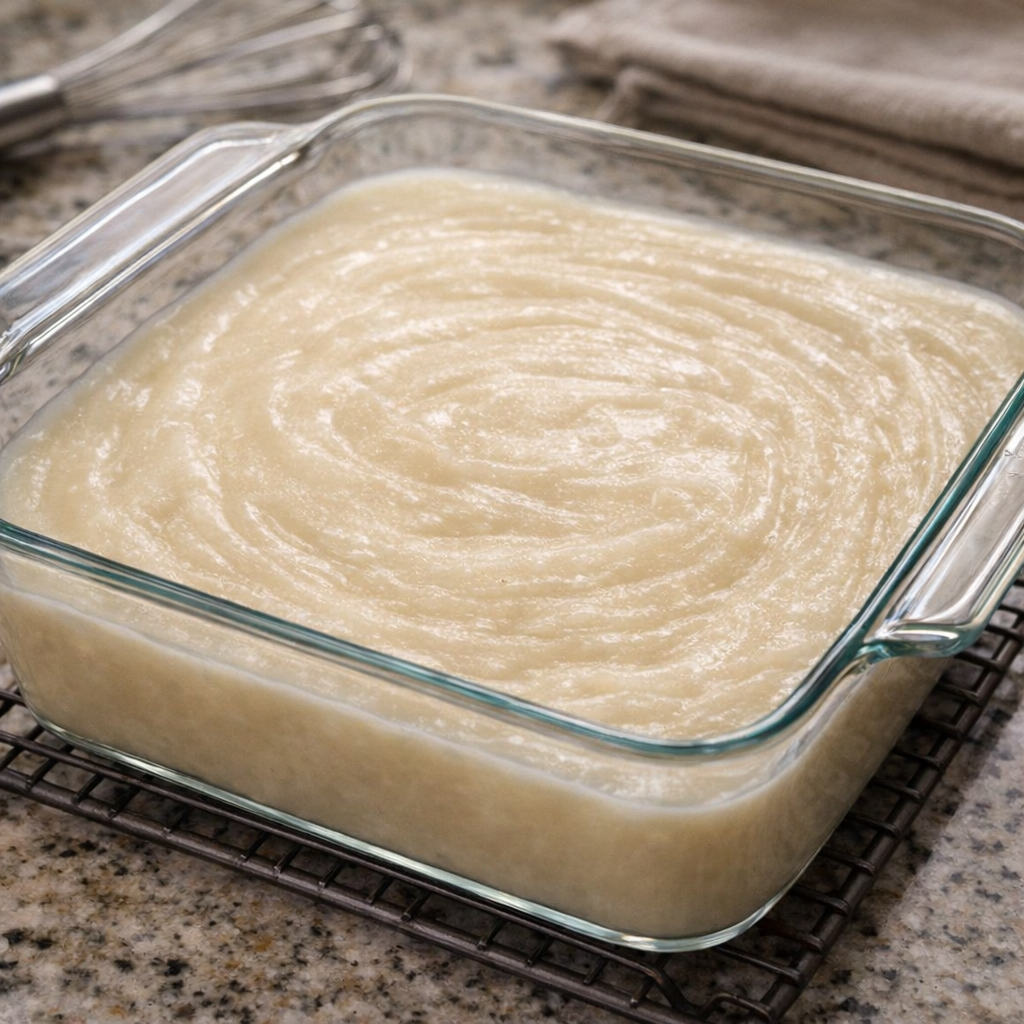
Pour the hot pudding into the waiting glass casserole dish, using a spatula to scrape the pan clean. Gently tap the dish on the counter to level the surface and release any large air bubbles. The top should look smooth and shiny.
Let the pudding cool at room temperature for about 20–30 minutes, just until the dish is no longer very hot to the touch. If you want to prevent a skin from forming, press a piece of plastic wrap directly onto the surface; if you like the old-fashioned skin, leave it uncovered.
Transfer the casserole dish to the refrigerator and chill for at least 2–3 hours, or until the pudding is fully set and cold. For the firmest slices, chill 4 hours or overnight.
To serve, scoop the chilled pudding into bowls with a large spoon, or cut into squares directly from the glass casserole dish for a more old-fashioned presentation. Enjoy it plain or with simple toppings, and store any leftovers covered in the refrigerator for up to 3 days.
Variations & Tips
This recipe is intentionally bare-bones, echoing its Depression-era roots, but there’s room to adapt it to what you have on hand. For a richer flavor, replace 1 cup of the milk with evaporated milk or half-and-half if your budget allows. To make a chocolate version, whisk 1/4–1/3 cup unsweetened cocoa powder into the sugar and cornstarch before adding the milk, and taste to see if you’d like a tablespoon or two more sugar.
For a spiced version, add 1/2 teaspoon ground cinnamon or a pinch of nutmeg with the vanilla. You can also stir in 1–2 tablespoons of butter at the end for extra silkiness, though the original version skipped it. For a firmer, sliceable pudding (more like a soft bar), increase the cornstarch to 2/3 cup; for a looser, more spoonable pudding, reduce cornstarch slightly to 6 tablespoons. If you need it dairy-free, use an unsweetened plant-based milk that thickens well with heat, such as soy or oat milk, and be aware that the texture may be slightly different.
Food safety tips: Always heat the milk mixture until it reaches a clear simmer and has thickened; this not only activates the cornstarch but also helps keep the pudding safe to eat. Cool it at room temperature only until it stops steaming, then refrigerate promptly—do not leave dairy-based pudding out for more than 2 hours. Store leftovers covered in the refrigerator and discard if they develop an off smell, separation that doesn’t stir back in, or any signs of mold. Avoid freezing, as the texture can become grainy and watery once thawed.


0 comments:
Post a Comment