This low carb 4-ingredient bacon wrapped water chestnut recipe is one of those old-school party bites that never goes out of style. My dad’s coworker passed it along decades ago, and it’s been showing up at game days, church potlucks, and holiday spreads ever since.
The magic is in the contrast: crisp, smoky bacon wrapped around a cool, crunchy water chestnut, all glazed in a simple, savory-sweet sauce that caramelizes in the oven. It’s the kind of snack people hover around the casserole dish for, waiting to grab that perfect crunchy piece before it’s gone.
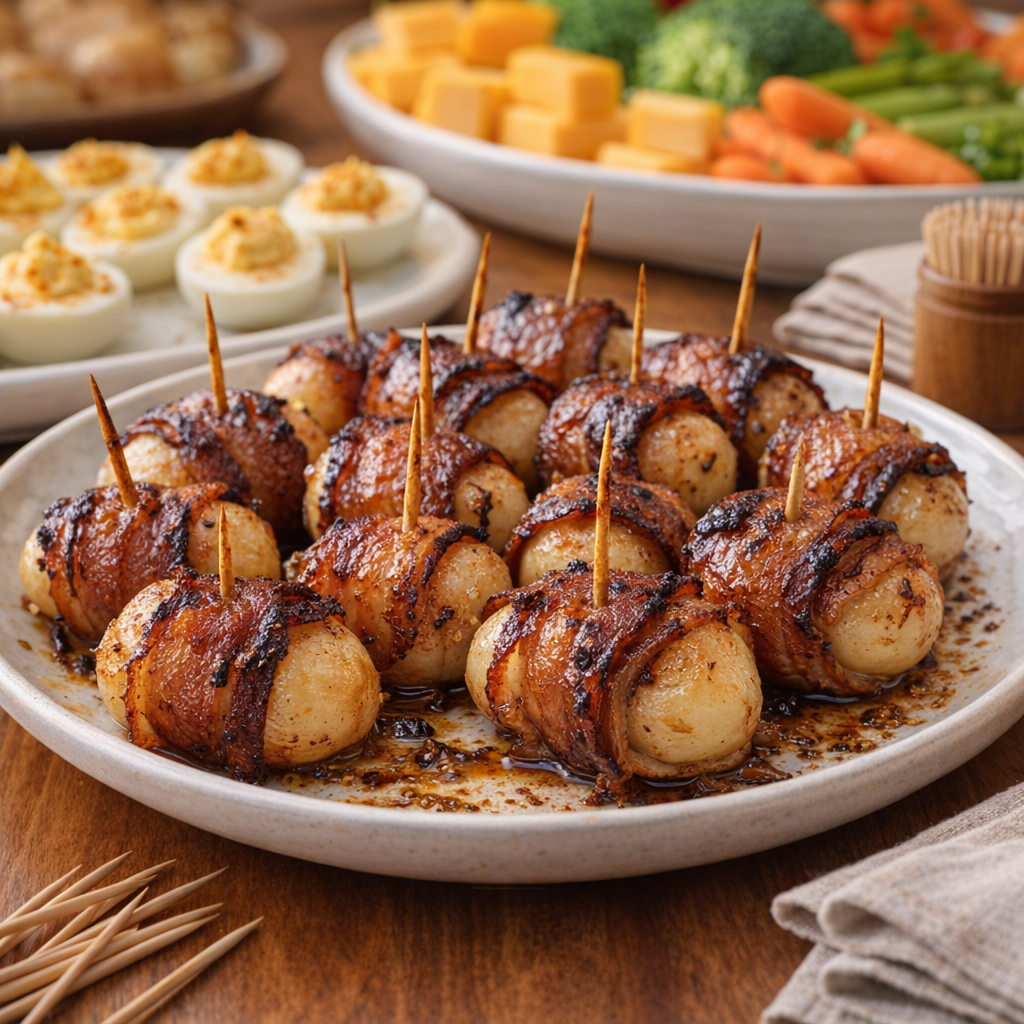
Serve these bacon wrapped water chestnuts right in the ceramic casserole dish you baked them in, so they stay warm and keep that glossy, caramelized look. They’re perfect alongside a veggie tray with ranch dip, a simple green salad, or other low-carb nibbles like deviled eggs and cheese cubes.
Set out a small bowl for the used toothpicks and some napkins, and if you want to make it more of a meal, pair them with a big pot of chili or a pan of roasted vegetables so everyone can build their own hearty plate.
Preheat your oven to 375°F (190°C). Lightly grease a ceramic casserole dish large enough to hold the bacon-wrapped water chestnuts in a single layer.
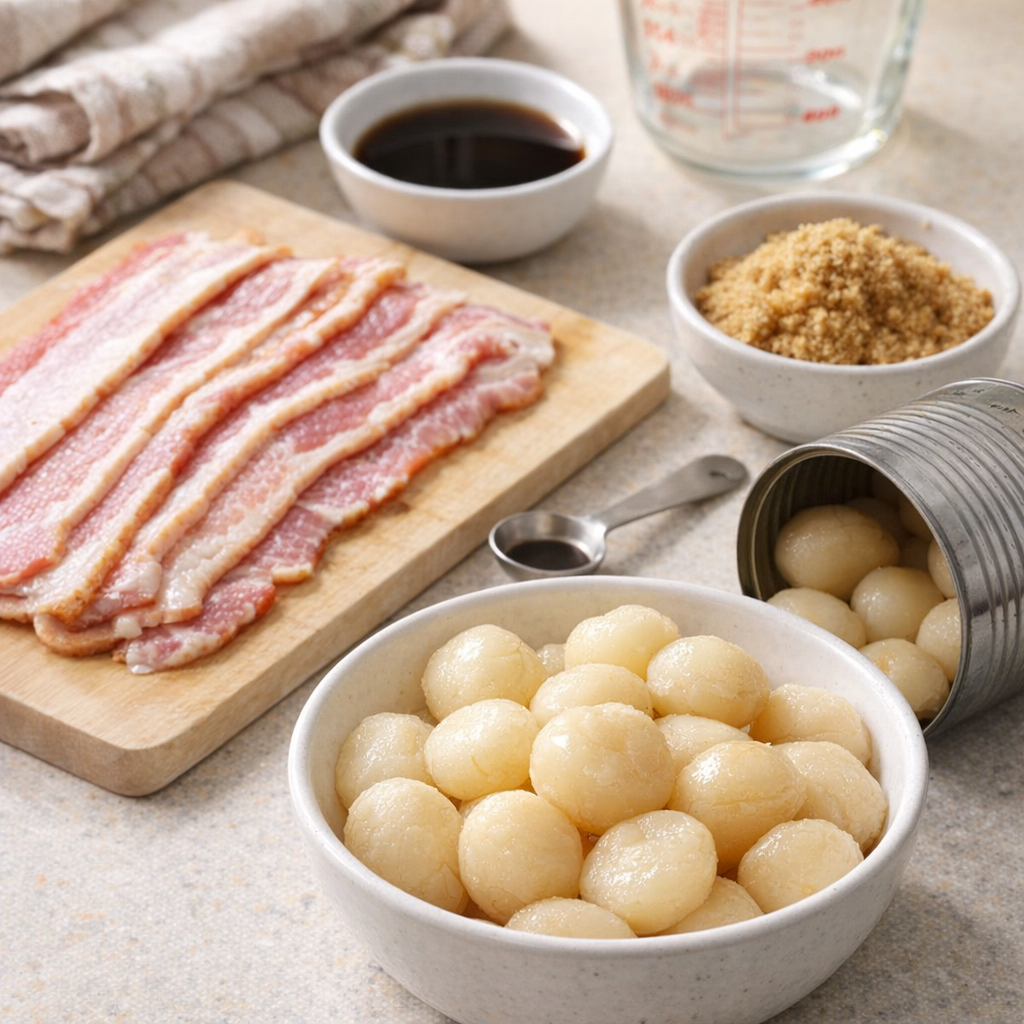
Drain the water chestnuts well and spread them on a clean kitchen towel or paper towels. Pat completely dry. This helps the bacon crisp and the glaze stick instead of steaming.
In a small bowl, stir together the soy sauce (or coconut aminos) and the low-carb brown sugar substitute until the sweetener is mostly dissolved. It will thicken more as it bakes, so don’t worry if it’s not perfectly smooth.
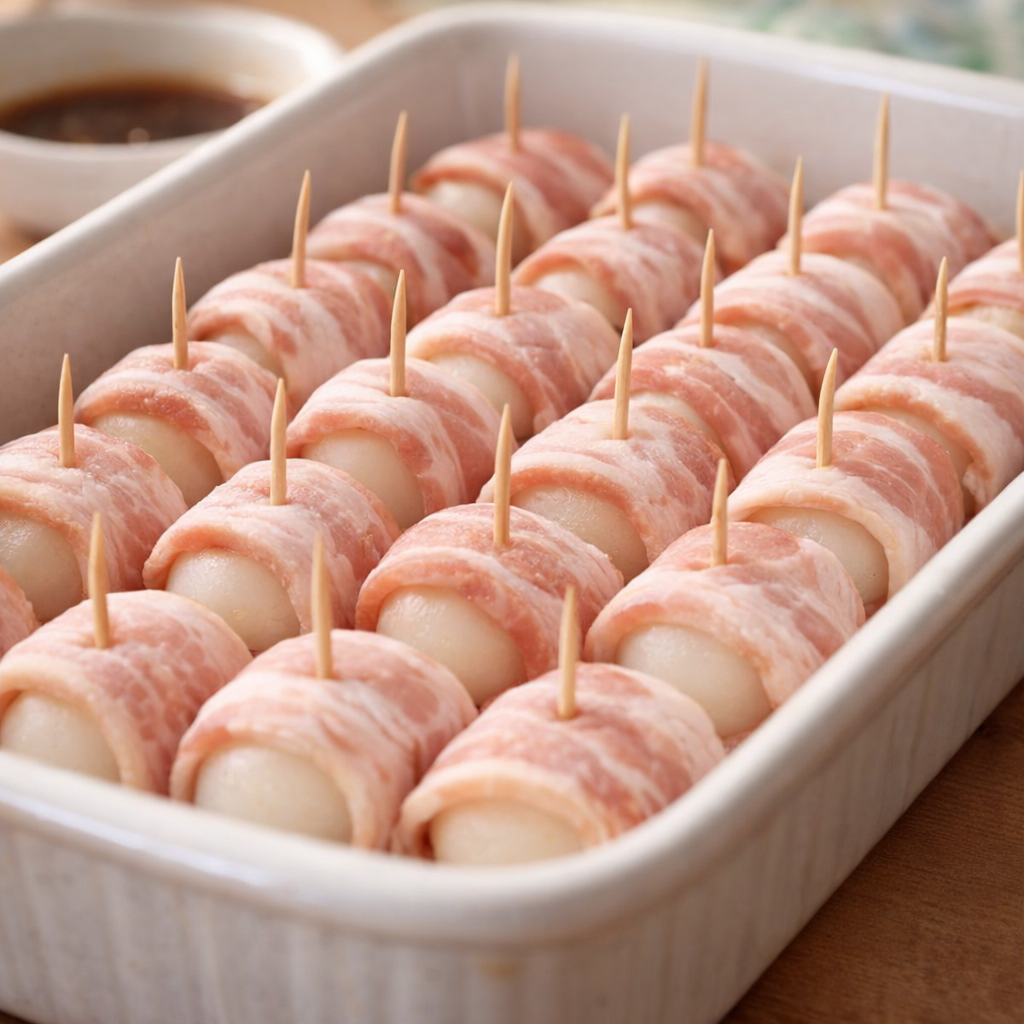
Cut the bacon slices into thirds so each piece is just long enough to wrap once around a water chestnut. If your bacon is very wide, you can trim it slightly so it doesn’t overlap too much.
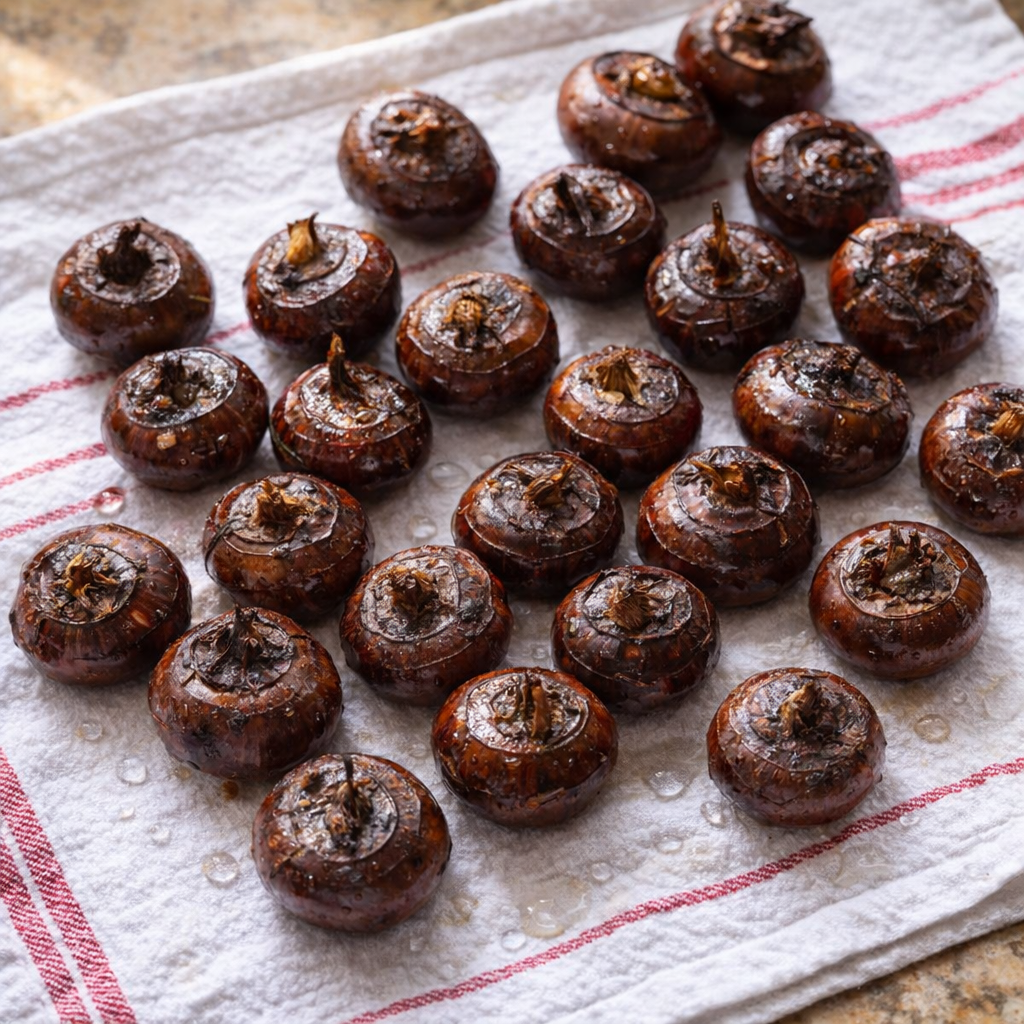
Wrap each water chestnut with a piece of bacon, pulling it snug so it holds its shape. Secure the bacon with a toothpick pushed all the way through the center. Place each piece in the prepared casserole dish, toothpick side up, leaving a little space between them so the bacon can crisp.
Give the glaze a quick stir, then spoon or brush it evenly over the tops and sides of the bacon-wrapped water chestnuts. Try to coat each piece so the bacon will caramelize nicely in the oven.
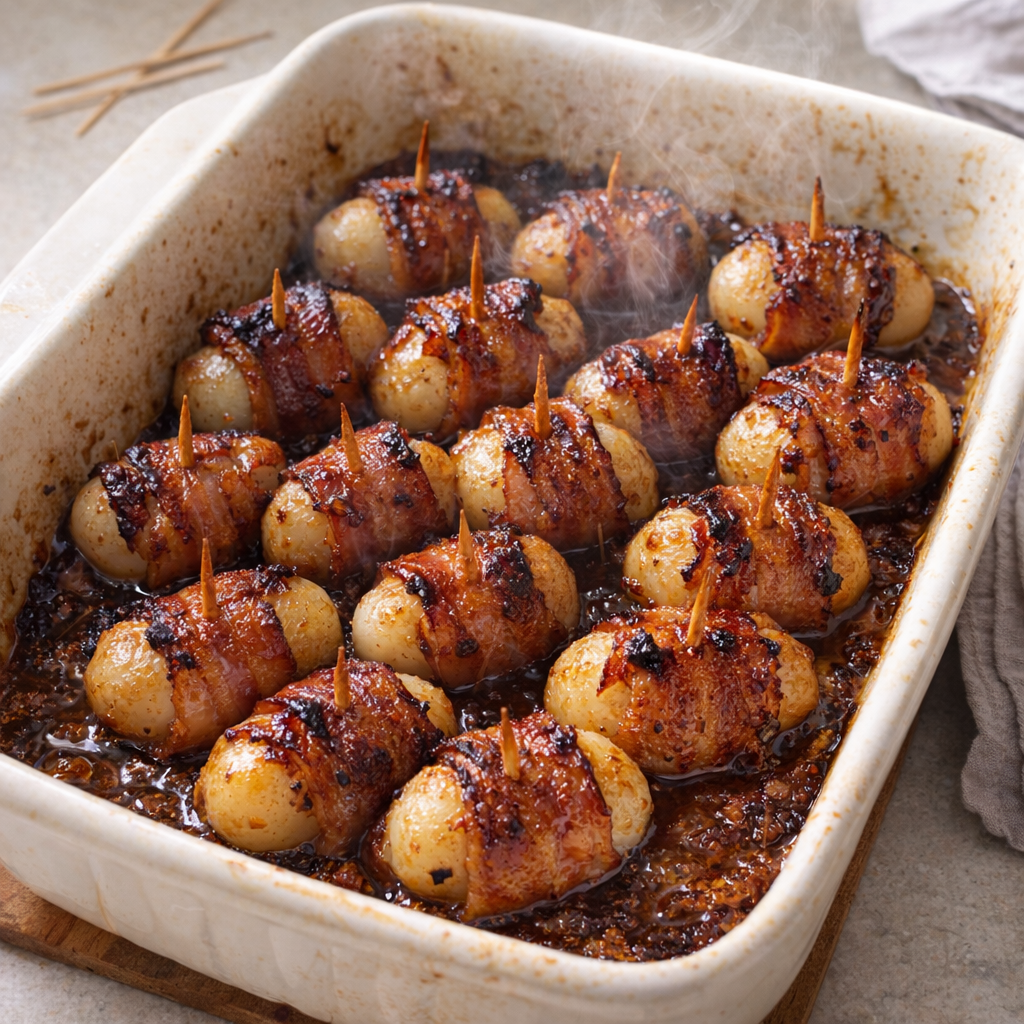
Bake uncovered for 35–45 minutes, turning the pieces once halfway through and spooning some of the rendered fat and glaze from the bottom of the dish back over the tops. They’re done when the bacon is deep golden brown, edges are slightly charred, and the glaze is bubbly and caramelized.
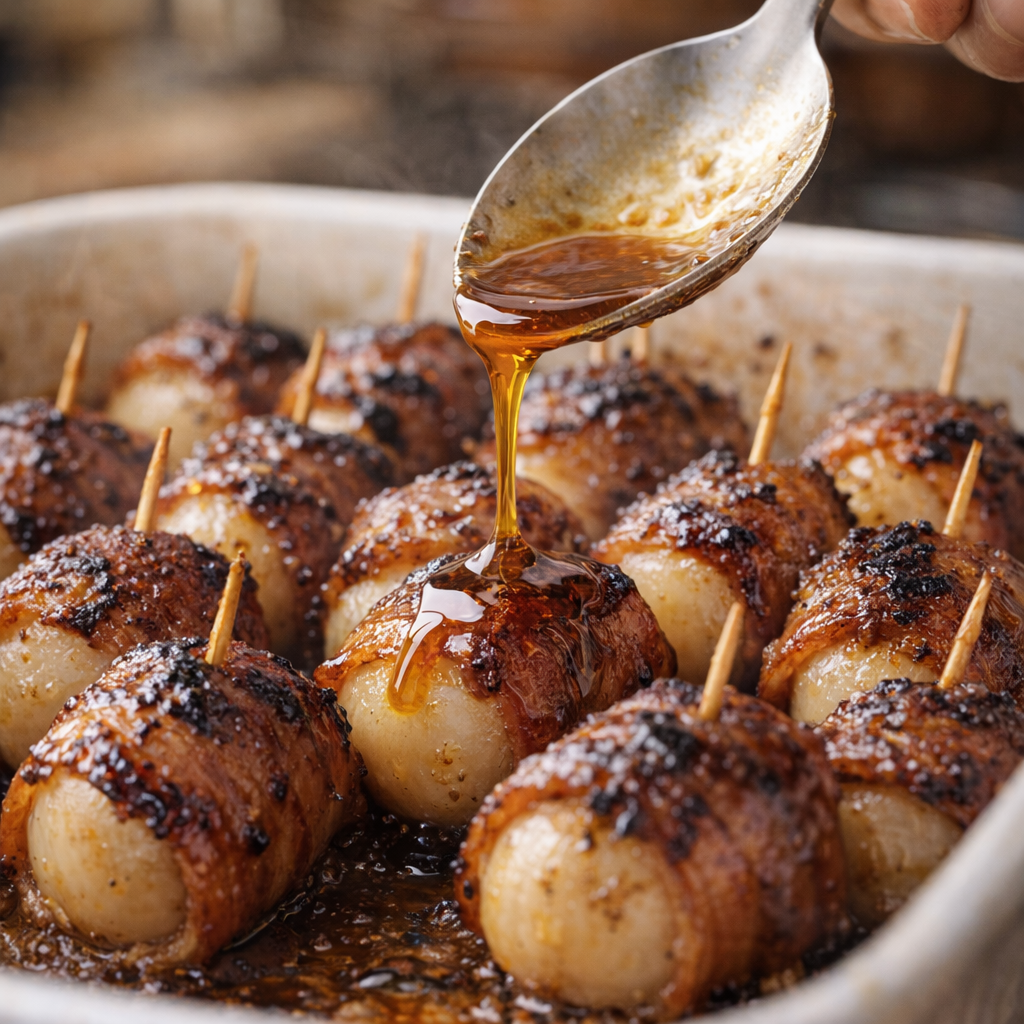
Carefully remove the casserole dish from the oven and let the bacon wrapped water chestnuts rest for about 5–10 minutes. The glaze will thicken as it cools slightly, and the bacon will crisp up even more.
Serve warm straight from the dish, making sure everyone has access to that perfect crunchy piece they’ll be fighting over.
You can easily tweak this old coworker recipe to fit your crew’s tastes while keeping it to just four ingredients. For a smokier bite, use smoked bacon or add a few drops of liquid smoke directly to the soy sauce before mixing in the low-carb sweetener. If you prefer a touch more heat, choose a spicy or peppered bacon, or stir a pinch of red pepper flakes into the glaze (this still counts as part of your soy sauce/sweetener mixture, so you’re not really adding another standalone ingredient).
For a milder, kid-friendly version, use regular bacon and coconut aminos for a slightly sweeter, less salty flavor. If you need to avoid soy, stick with coconut aminos and taste as you go, since it’s naturally sweeter and less salty than soy sauce. To keep this appetizer as low carb as possible, choose a brown sugar substitute that’s labeled zero or very low net carbs and avoid using honey, maple syrup, or regular brown sugar.
You can also par-bake the bacon-wrapped water chestnuts for 10–15 minutes before adding the glaze if you like your bacon extra crisp. Food safety tips: Always keep raw bacon refrigerated until you’re ready to assemble, and wash your hands, cutting boards, and knives well after handling it. Make sure the bacon is cooked through and sizzling before serving; the high oven temperature will take care of this if you bake until the bacon is deeply browned and crisp.
If you’re preparing these ahead, assemble and refrigerate the wrapped water chestnuts (covered) for up to 24 hours, then add the glaze and bake just before serving. Leftovers should be cooled, covered, and refrigerated within 2 hours, and reheated in a hot oven or air fryer until steaming and sizzling before eating.