Top Ad 728x90

Thursday, June 11, 2026

No-bake favorite': Just 4 ingredients.

This 4-ingredient chocolate peanut butter no-bake bar is one of those back-pocket recipes every home cook should have. It’s a modern, streamlined cousin of the Midwestern church-basement bars many of us grew up with—think potlucks, school bake sales, and those glossy community cookbooks.

Chocolate peanut butter bars on a small dessert plate

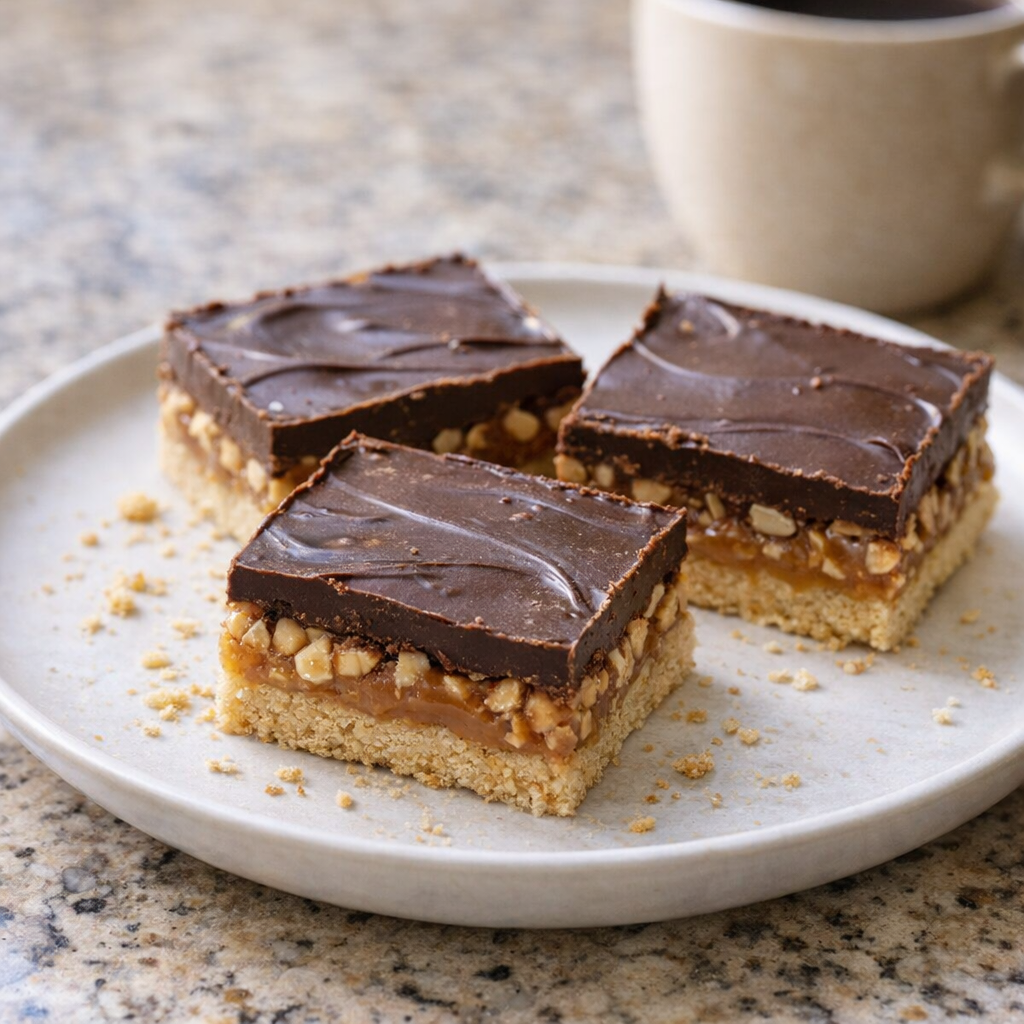
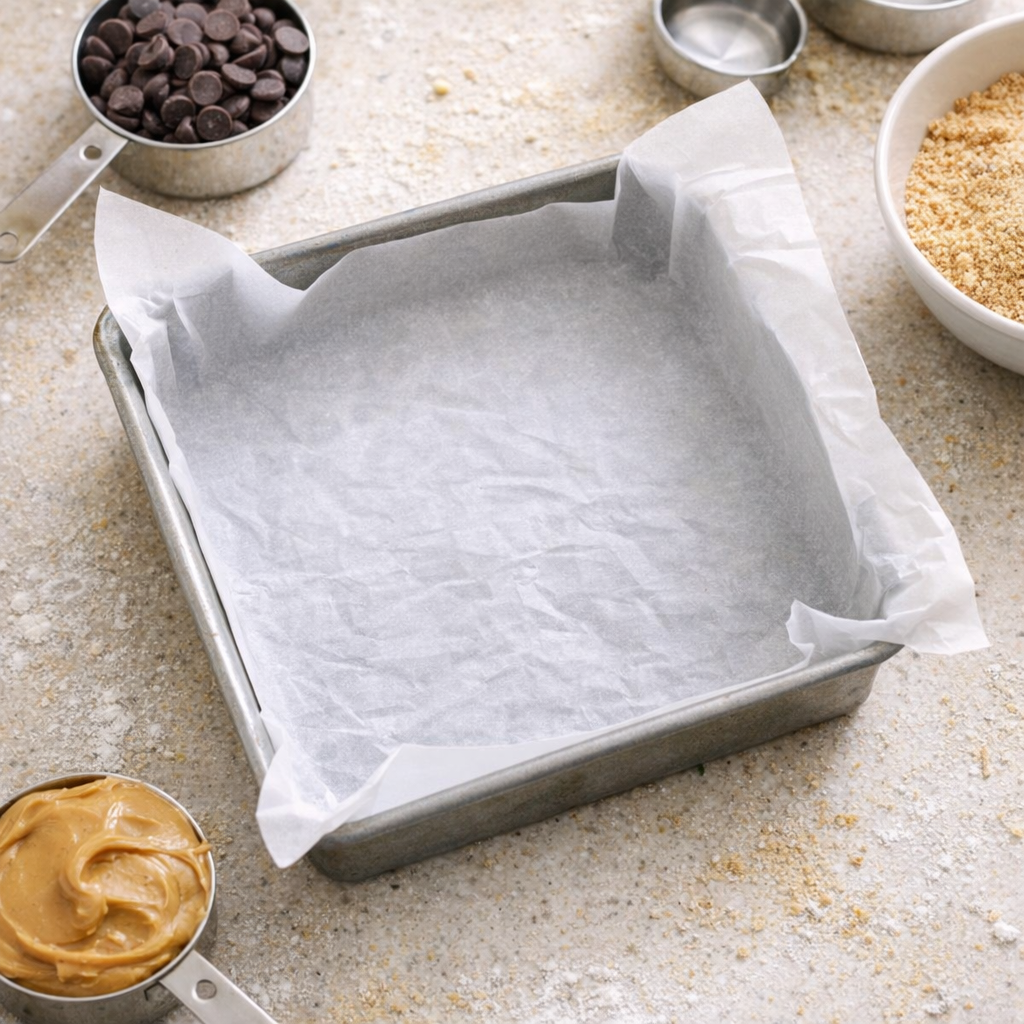
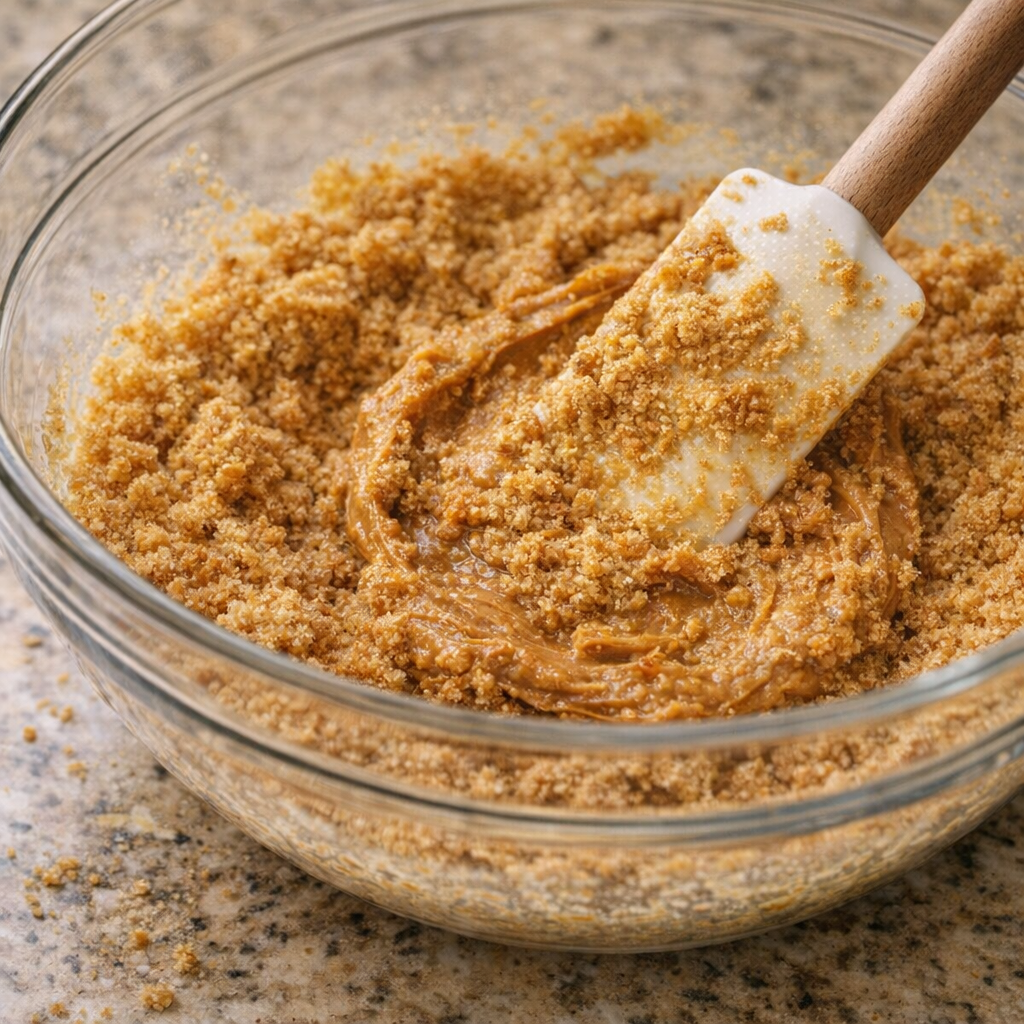
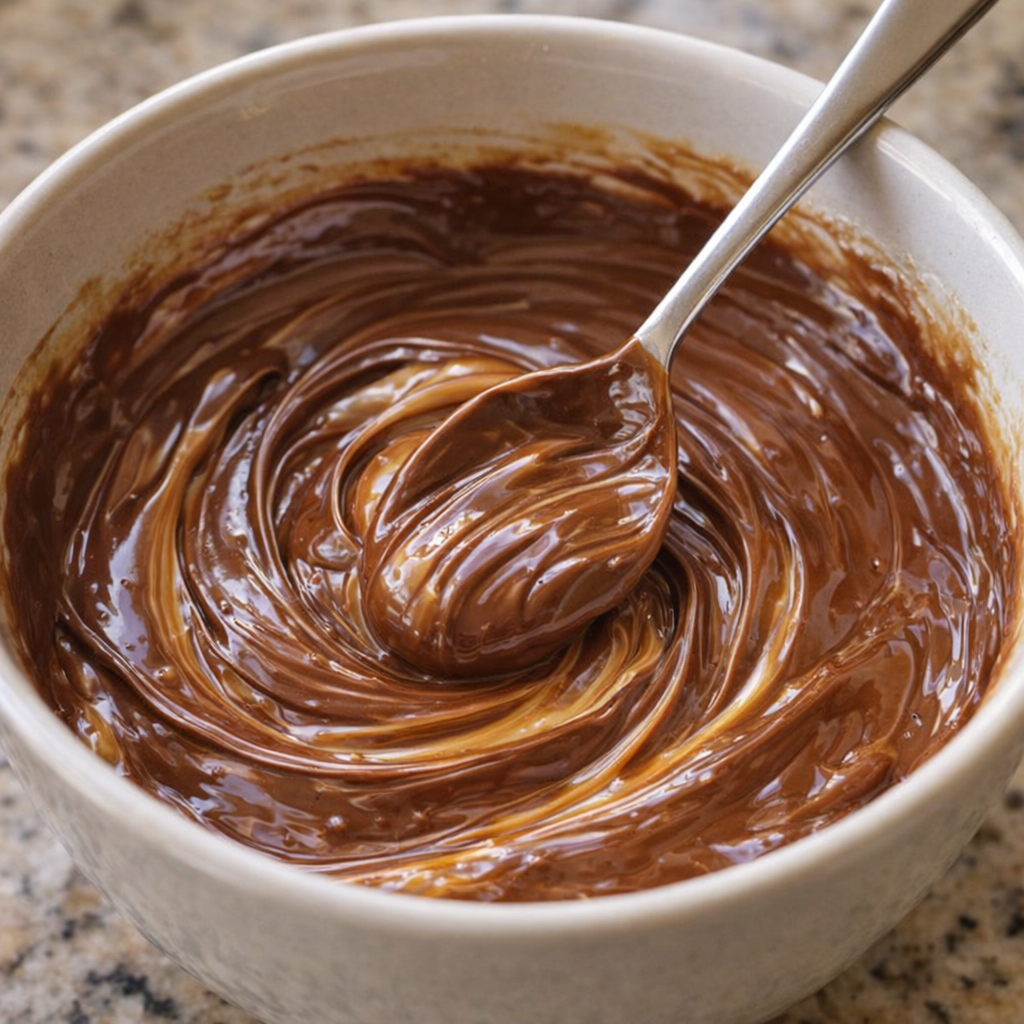
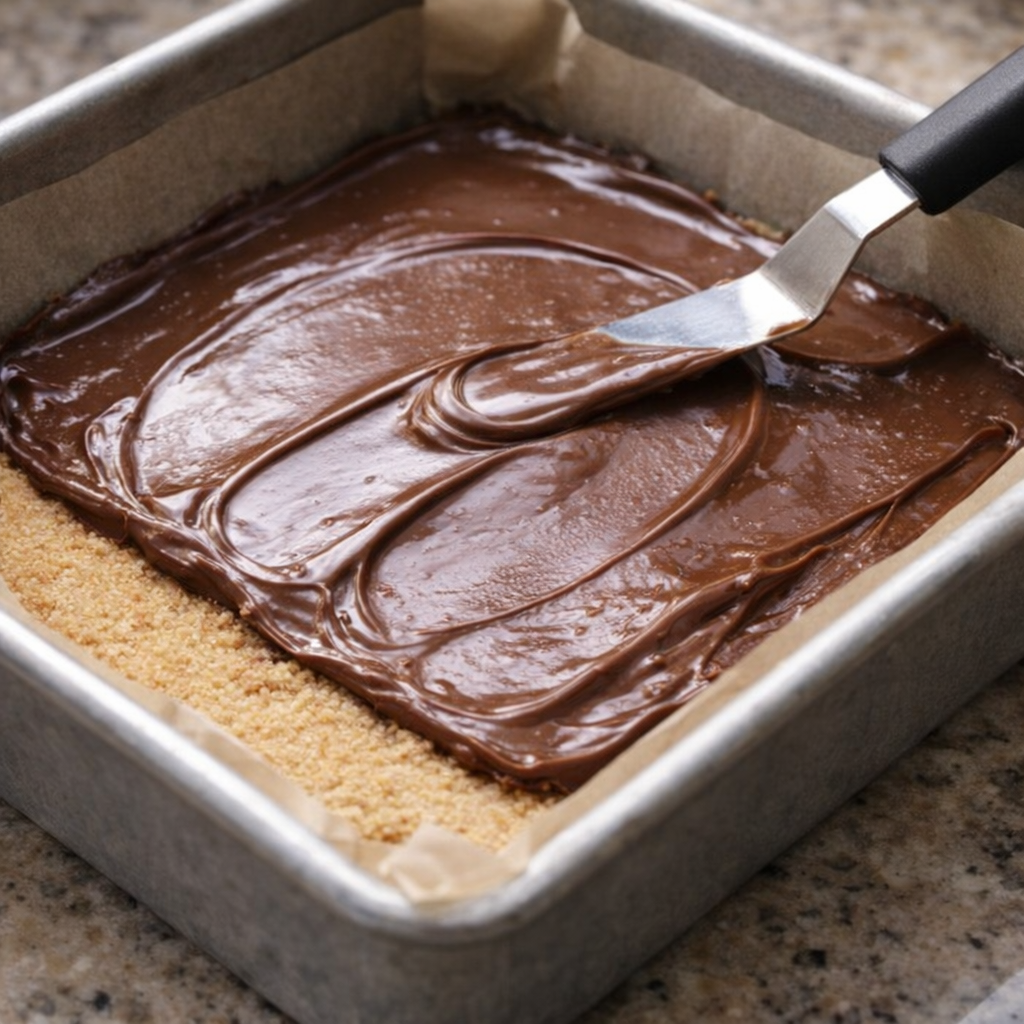
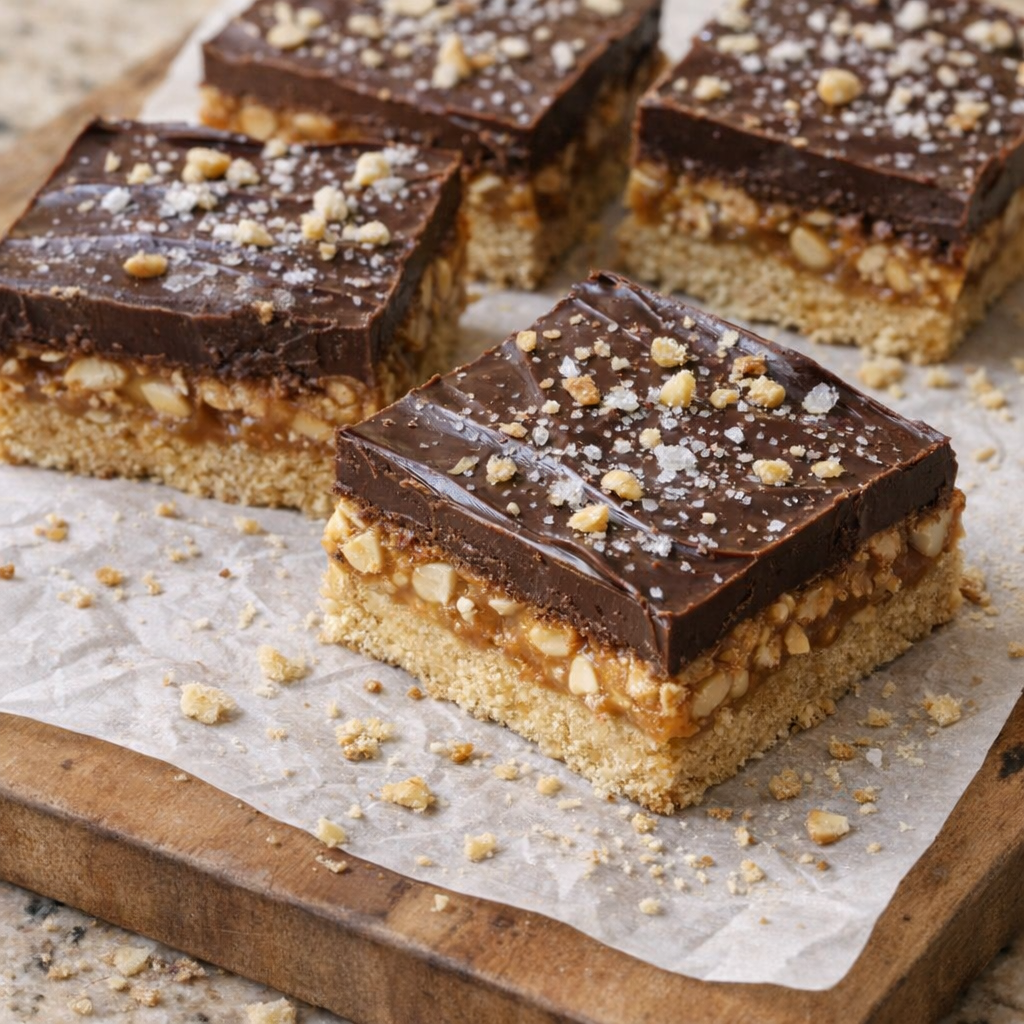
At its core, this is a simple pressed crust of peanut butter and crushed graham crackers (or similar cookies), capped with a smooth chocolate layer. No oven, no candy thermometer, and no special equipment required. You get the nostalgic flavor of a peanut butter cup in a pan: salty-sweet, a little fudgy, and wonderfully satisfying.

It’s ideal for warm days when you don’t want to turn on the oven, for quick weeknight treats, or for those moments when you need something dessert-like in under 20 minutes of hands-on time.

These bars are rich, so I like to cut them small and pair them with something that contrasts the sweetness. A cup of hot coffee or black tea balances the chocolate and peanut butter nicely, while a cold glass of milk (dairy or non-dairy) leans into the classic peanut-butter-and-milk comfort vibe.

Small dessert spread with bars, berries, and coffee

For a slightly more composed dessert, serve a bar alongside fresh berries or sliced strawberries—the acidity and juiciness keep the richness in check. If you’re putting these out for a gathering, mix them on a platter with something lighter, like crisp butter cookies or a citrusy shortbread, so guests can alternate between flavors and textures.

4-Ingredient Chocolate Peanut Butter No-Bake Bars

Servings: 16 small bars


Ingredients
1 1/2 cups (about 180 g) graham cracker crumbs (or plain digestive biscuit crumbs)
1 cup (240 g) creamy peanut butter, divided (3/4 cup for base, 1/4 cup for topping)
1/2 cup (115 g) unsalted butter, melted
1 1/2 cups (260 g) semisweet chocolate chips
Directions
Prepare the pan: Line an 8x8-inch (20x20 cm) baking pan with parchment paper, leaving some overhang on two sides to make lifting the bars easier. Lightly grease the parchment if you like, though it’s not strictly necessary.
Parchment-lined square pan on a kitchen counter
Make the peanut butter base: In a medium bowl, stir together the graham cracker crumbs and melted butter until the mixture looks like damp sand. Add 3/4 cup of the peanut butter and mix until everything is evenly combined and you have a thick, cohesive mixture that holds together when pressed.
Peanut butter crumb mixture being stirred in a bowl
Press the crust: Transfer the peanut butter mixture to the prepared pan. Use the back of a spoon, a spatula, or the bottom of a measuring cup to press it firmly and evenly into the bottom of the pan. Take a moment to really compact it—this helps the bars slice cleanly later.
Melt the chocolate and peanut butter: In a microwave-safe bowl, combine the chocolate chips and the remaining 1/4 cup peanut butter. Microwave in 20–30 second bursts, stirring after each interval, until the chocolate is mostly melted and the mixture is smooth and glossy. (Alternatively, melt gently in a heatproof bowl set over a pan of barely simmering water, stirring frequently.)
Glossy melted chocolate and peanut butter in a bowl
Top the bars: Pour the warm chocolate-peanut butter mixture over the pressed crust. Tilt the pan or use an offset spatula to spread the topping into an even layer, making sure it reaches all the corners.
Chocolate topping being spread over the crust
Chill to set: Refrigerate the pan for at least 1–2 hours, or until the chocolate topping is fully set and firm to the touch. For the cleanest slices, let the bars chill a bit longer so the layers are well stabilized.
Slice and serve: Use the parchment overhang to lift the slab out of the pan and transfer to a cutting board. Let it sit at room temperature for 5–10 minutes to soften slightly, then cut into 16 small squares (or larger pieces, if you prefer). Store leftovers covered in the refrigerator for up to 5 days, or freeze for longer storage.
Variations & Tips
Because this recipe is so simple, it’s an easy canvas for small tweaks that change the character of the bars.

For added texture, stir a handful of finely chopped roasted peanuts into the base before pressing it into the pan, or sprinkle them over the chocolate layer before chilling. If you prefer a slightly less sweet dessert, use bittersweet chocolate (60–70% cacao) instead of semisweet, and add a pinch of fine salt to the crust mixture to sharpen the flavors.

Finished bars topped with chopped peanuts and flaky salt

Crunchy peanut butter can be used in place of creamy for more texture; just be sure it’s well-stirred so the oil is evenly distributed. To make them gluten-free, swap the graham crackers for certified gluten-free graham-style crumbs or finely crushed gluten-free cookies.

For a flavor twist, add 1/2 teaspoon of vanilla extract to the crust, or a light sprinkle of flaky sea salt on top of the chocolate before it sets—a small touch that gives the bars a more grown-up, bakery-style finish. If your kitchen runs warm, keep the bars chilled until close to serving time so the layers stay firm and distinct.


0 comments:

Post a Comment

إعلان1
إعلان2
إعلان3

Top Ad 728x90