Top Ad 728x90

More Stories

Thursday, March 26, 2026

My aunt makes this for every Sunday dinner and it is

by


These Southern 3-ingredient sausage balls are the definition of dangerously easy. My aunt has made them for every Sunday dinner since I was a kid, and they are always the first thing to disappear from the table. They’re a classic Southern party snack: just breakfast sausage, shredded cheddar, and baking mix rolled into bite-sized balls and baked until the edges are golden and crispy with little pockets of melted cheese. No chilling, no fancy equipment, and they’re perfect for busy weekends, game days, or whenever you need something everyone will grab without hesitation.
Plate of golden sausage balls on a kitchen counter
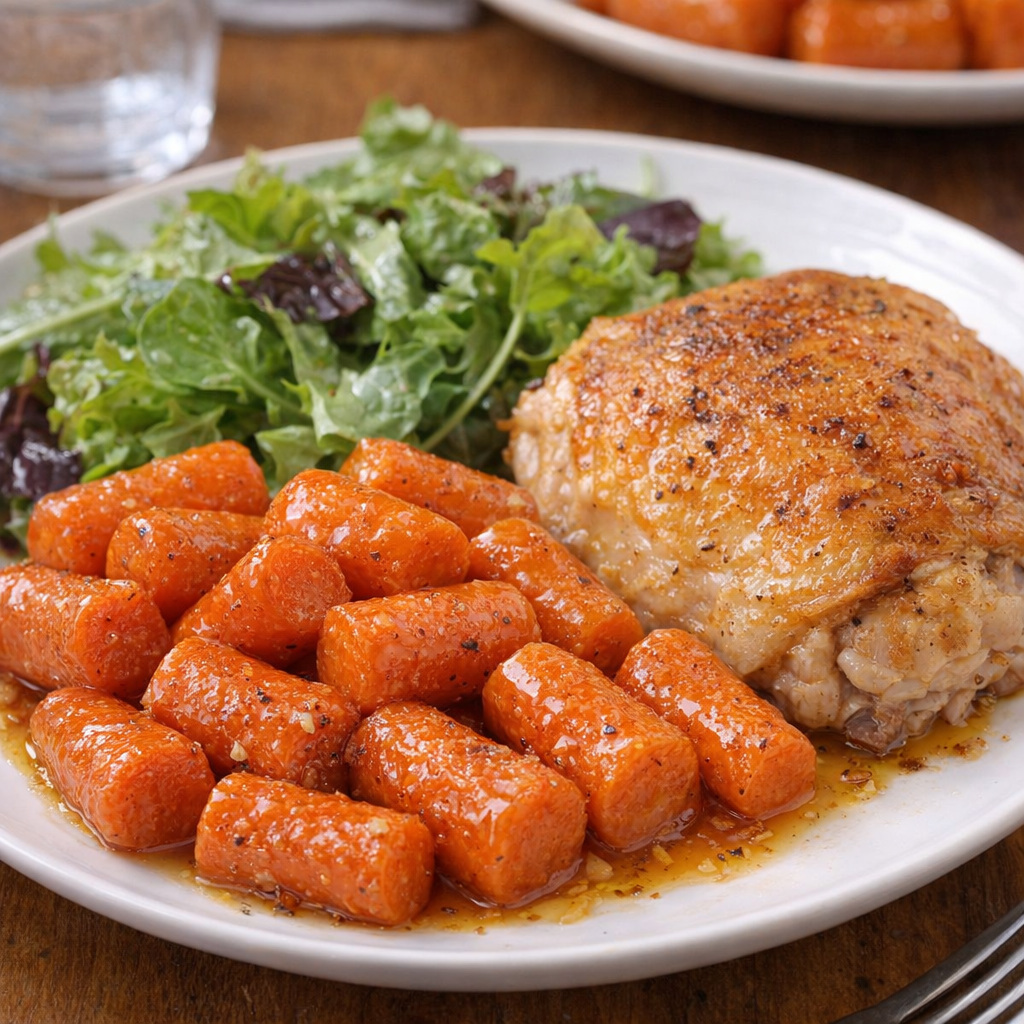
Serve these sausage balls warm on a simple white plate or platter with toothpicks for easy grabbing. They’re great alongside a big salad, scrambled eggs, or fruit for a casual brunch, or next to other finger foods like veggie sticks and chips for game night. If you want to add a dip, ranch, honey mustard, or a spicy ketchup all work really well, but they’re flavorful enough to eat plain. They also travel well, so they’re a solid option for potlucks, office parties, or any Sunday dinner where you need a guaranteed crowd-pleaser.
Southern 3-Ingredient Sausage Balls
Servings: 24 sausage balls (about 6–8 servings as an appetizer)
Ingredients
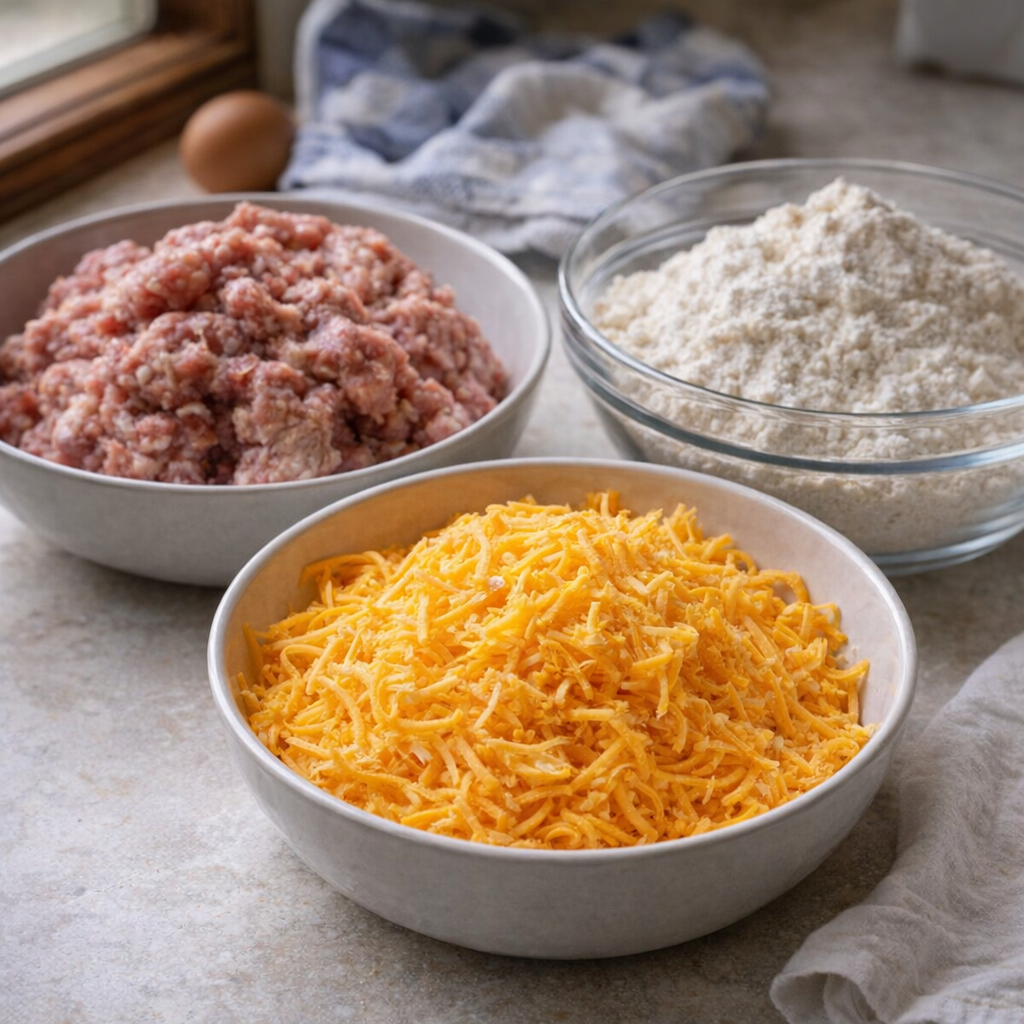
1 pound (16 oz) raw pork breakfast sausage, mild or hot
2 cups (about 8 oz) shredded sharp cheddar cheese, packed
2 cups (about 8.5 oz) biscuit baking mix (such as Bisquick)
Measured sausage, cheddar, and baking mix in prep bowls
Directions
Preheat your oven to 350°F (175°C). Line a large baking sheet with parchment paper or lightly grease it to prevent sticking.
In a large mixing bowl, add the raw pork breakfast sausage, shredded sharp cheddar cheese, and biscuit baking mix.
Mixing bowl with sausage, cheddar, and baking mix before stirring
Use your hands to mix everything together until the sausage, cheese, and baking mix are fully combined and no dry pockets of mix remain. This takes a few minutes of kneading; the mixture will be thick and slightly sticky.
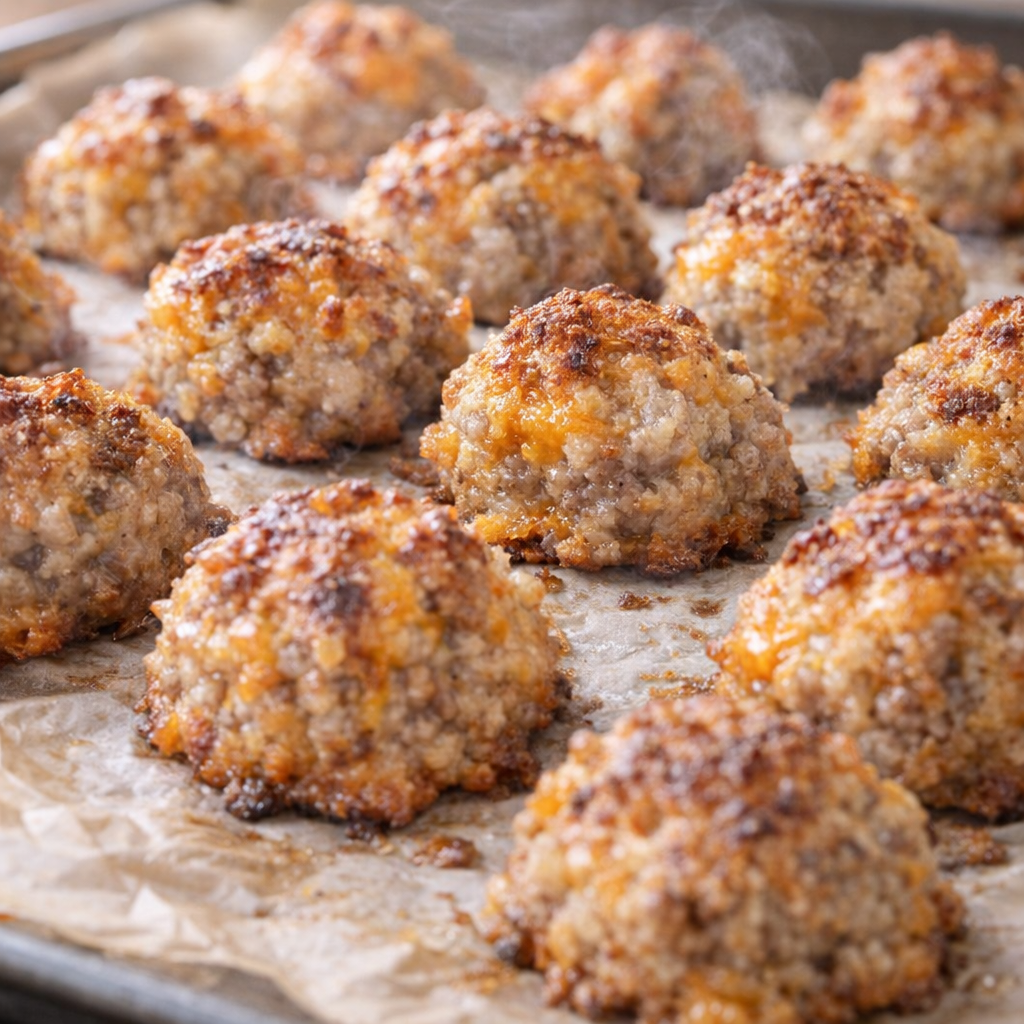
Pinch off portions of the mixture and roll into tight, smooth balls about 1 to 1 1/4 inches in diameter (roughly 1 tablespoon each). Place them on the prepared baking sheet, spacing them about 1 inch apart so they can brown evenly.
Unbaked sausage balls lined up on a parchment-covered sheet pan
Once all the sausage balls are rolled and on the sheet, bake in the preheated oven for 18–22 minutes, or until they are cooked through and the edges are golden brown with little spots of melted cheddar visible.
Remove the baking sheet from the oven and let the sausage balls cool on the pan for about 5 minutes to firm up slightly. Transfer to a serving plate and serve warm.
Freshly baked sausage balls cooling on the pan
If making ahead, let the baked sausage balls cool completely, then store in an airtight container in the refrigerator for up to 3 days. Reheat on a baking sheet at 325°F (165°C) for 8–10 minutes, or until warmed through and edges are crisp again.
Variations & Tips
Use hot breakfast sausage instead of mild if your crowd likes a little kick, or do half mild and half hot for a balanced heat. For extra cheesy sausage balls, bump the cheddar up to 2 1/2 cups and pack it in firmly when measuring.

If your mixture feels too dry and crumbly to roll, work in 1–2 tablespoons of milk, a little at a time, until it holds together; if it feels too soft, sprinkle in another tablespoon or two of baking mix.

Sausage balls served with dipping sauces for a casual gathering

You can swap sharp cheddar for extra-sharp or a cheddar-jack blend, but stick with a cheese that melts well. For make-ahead prep, roll the sausage balls and freeze them raw on a baking sheet until solid, then transfer to a freezer bag; bake from frozen at 350°F, adding 3–5 extra minutes to the bake time. To keep them warm for a longer gathering, place baked sausage balls in a slow cooker on the warm setting with a clean kitchen towel under the lid to catch condensation so they stay crisp on the outside

My mother in law makes this every spring and the pan is always empty.

by

Every spring, my mother-in-law shows up to Easter with a big white bowl of these southern 3-ingredient honey glazed carrots, and I swear the pan is always scraped clean before the ham is even carved. They’re the kind of no-fuss side dish you can throw together after work but still feel proud serving on a holiday table.

White serving bowl filled with glossy honey glazed carrots on a holiday table

Just carrots, butter, and honey—nothing fancy, but the way they cook down into a glossy, sweet-salty glaze feels very classic Southern potluck. If you’re juggling a busy workweek and still want something that tastes like it simmered on grandma’s stove all afternoon, this is that recipe.

These honey glazed carrots are perfect alongside baked ham, roast chicken, or meatloaf, and they fit right in on a holiday spread with mashed potatoes, green beans, and dinner rolls. On weeknights, I’ll pair them with simple baked chicken thighs and a bagged salad to make the plate feel a little more special.

Weeknight dinner plate with glazed carrots, baked chicken, and salad

They’re also great with grilled pork chops or salmon, since the sweetness of the honey plays really well with smoky or savory mains. If you’re hosting, serve them in a white ceramic bowl so the bright orange color and glossy glaze can shine on the table.

Southern 3-Ingredient Honey Glazed Carrots

Servings: 4

Ingredients
1 1/2 pounds carrots, peeled and cut into 1/2-inch thick slices or small sticks
3 tablespoons unsalted butter
3 tablespoons honey
Directions
Prep the carrots: Peel the carrots and slice them into 1/2-inch thick rounds or small sticks so they cook evenly. Aim for similar sizes so they become tender at the same time.
Freshly peeled and sliced carrots on a cutting board
Par-cook the carrots: Add the sliced carrots to a medium saucepan and cover with cold water by about 1 inch. Place over medium-high heat, bring to a boil, then reduce to a gentle simmer. Cook for 6–8 minutes, just until the carrots are fork-tender but not falling apart. Drain well and let them sit in the colander for a minute to steam off excess moisture.
Start the glaze: In the same saucepan (wipe it out if needed), melt the butter over medium heat. Once the butter is fully melted and just starting to bubble, stir in the honey until the mixture looks smooth and glossy.
Butter and honey melting together in a saucepan
Glaze the carrots: Add the drained carrots back into the pan with the honey-butter mixture. Stir to coat every piece. Continue cooking over medium heat for 5–7 minutes, stirring frequently, until the liquid thickens into a shiny glaze and clings to the carrots. The carrots should look bright orange and glossy, and the glaze should be slightly sticky, not runny.
Adjust and finish: Taste a carrot and, if needed, add a tiny pinch of salt from your pantry to balance the sweetness (optional, but my mother-in-law always does). Give everything a final stir, making sure the carrots are evenly coated and tender.

Glazed carrots being stirred in a saucepan
Serve: Transfer the glazed carrots to a warm white ceramic serving bowl. Spoon any extra honey-butter from the pan over the top so they really glisten. Serve right away while hot—the glaze will thicken slightly as it cools, making the carrots even more sticky and irresistible.
Variations & Tips

If you want to keep the core recipe true to the 3-ingredient idea but still play a little, you can tweak things with what you already have on hand. For a deeper flavor, let the butter cook a bit longer until it’s lightly browned before adding the honey—this gives the carrots a nutty, almost toffee-like note without changing the ingredient list. You can also adjust the sweetness by using a bit less honey for a more savory side or a bit more for a holiday-style dish.


Finished honey glazed carrots in a white serving bowl

My mother-in-law sometimes uses baby carrots when she’s in a rush; they work fine, just add a few extra minutes to the simmer time until they’re tender. If you need to make these ahead, cook and drain the carrots earlier in the day, then stash them in the fridge. Right before dinner, warm the butter and honey, add the carrots, and glaze them fresh so they still look bright and glossy.

For a slightly different texture, you can roast the par-cooked carrots on a sheet pan at 400°F for 10–15 minutes after glazing to get a few caramelized edges while keeping that sticky honey-butter finish.


Aunt sandy brought this to every church potluck

by


 This frozen strawberry fruit salad is exactly the kind of thing my Aunt Sandy would show up with at every church potluck: it’s cheap to make, feeds a crowd, and the bowl is always scraped clean by the time you go back for seconds. It’s pale pink, creamy, and full of little strawberry bits—basically a cross between a dessert and a side dish. You can stir it together in about 10 minutes with freezer and pantry staples, then stash it in the freezer until it’s time to head out the door. It’s perfect for potlucks, baby showers, summer cookouts, or anytime you need something cold and low-effort that everyone—from kids to grandparents—will happily eat.

Serve this frozen fruit salad in a simple white bowl or 9x13 pan, scooped with a big spoon or an ice cream scoop. It pairs well with classic potluck mains like baked ham, fried chicken, pulled pork sandwiches, or sloppy joes, and it’s great alongside salty sides like potato chips, pasta salad, or a veggie tray. Keep it in the freezer until just before serving, then let it sit on the counter for 10–15 minutes so it’s easier to scoop. It also makes a fun make-ahead dessert for weeknights—just scoop it into small bowls and add extra sliced strawberries on top if you want to dress it up a bit.
Frozen Strawberry Fruit Salad
Servings: 10-12

Ingredients
2 cups frozen sliced strawberries, slightly thawed
2 containers (6 ounces each) strawberry yogurt
1 container (8 ounces) frozen whipped topping, thawed
1/4 cup granulated sugar (optional, to taste)
1 teaspoon vanilla extract (optional)
Pinch of salt (optional, to balance sweetness)
Nonstick cooking spray or a light drizzle of oil for the dish (optional)
Directions
Lightly spray or grease a medium freezer-safe dish (an 8x8 or 9x9 inch dish, or a medium white serving bowl) so the frozen salad scoops out easily later. Set aside on your counter.
Measure out the frozen sliced strawberries into a medium bowl and let them sit at room temperature for about 10–15 minutes, just until they start to soften around the edges but are still very cold and mostly frozen.
Once the strawberries are slightly thawed, roughly chop any large pieces so you get nice bite-sized bits throughout the salad. You can do this right in the bowl using a sharp knife or kitchen shears.
In a large mixing bowl, add the strawberry yogurt, thawed whipped topping, sugar (if using), vanilla (if using), and a small pinch of salt. Gently fold everything together with a spatula until the mixture is smooth, pale pink, and well combined.
Add the chopped, slightly thawed strawberries to the yogurt mixture. Fold them in gently so the berries are evenly distributed but you still see little chunks of strawberry throughout.
Taste the mixture and adjust the sweetness if needed by adding a bit more sugar and folding again until dissolved.
Transfer the mixture into your prepared dish or serving bowl, smoothing the top with a spatula so it looks even and airy.
Place the dish in the freezer, uncovered, for about 1–2 hours, or until the salad is firm enough to scoop but not rock hard. For longer storage, cover tightly with plastic wrap or a lid once it’s mostly frozen.
When you’re ready to serve, take the salad out of the freezer and let it sit on the counter for 10–15 minutes to soften slightly. Scoop into bowls or onto plates, making sure everyone gets plenty of strawberry pieces.
Return any leftovers to the freezer, tightly covered. For best texture, enjoy within 3–4 days.
Variations & Tips
To stretch this for a bigger crowd (very Aunt Sandy style), fold in 1–2 cups of mini marshmallows or a drained can of crushed pineapple before freezing; both add volume without adding much cost. If you like more texture, stir in 1/2 cup chopped pecans or walnuts right before freezing, or sprinkle them over just before serving so they stay crunchy. For a slightly lighter version, use light strawberry yogurt and light whipped topping—no one at the potluck will notice. If you only have plain or vanilla yogurt on hand, use that and add 1/2–1 cup of extra chopped frozen strawberries plus a spoonful of strawberry jam to boost the berry flavor. You can also swap half of the strawberries for another frozen fruit like peaches or mixed berries, keeping the total fruit amount the same. For easy single-serve portions, spoon the mixture into a muffin tin lined with paper liners, freeze until firm, then pop them out and store in a zip-top bag; they’re perfect for grabbing one at a time for lunches or after-dinner treats.

My aunt brings this ultimate cozy casserole

by


 This slow cooker 4-ingredient chicken and stuffing is the kind of cozy casserole my Midwestern family expects at every Sunday dinner. It reminds me of the church-basement potlucks I grew up with: tender chicken, a rich, creamy sauce, and a savory bread stuffing that turns golden and fluffy on top. It’s a complete, stick-to-your-ribs meal made with pantry-friendly ingredients and almost no prep—exactly the sort of practical comfort food busy home cooks lean on when they want something filling without fuss.

Because this casserole already combines protein and starch, I like to keep the sides light and fresh. A simple green salad with a tangy vinaigrette or steamed green beans with a squeeze of lemon cut through the richness nicely. If you want to stretch the meal for a crowd, serve it with roasted carrots or a tray of buttered corn. A crisp white wine or iced tea pairs well, and for dessert, something simple and bright—like fresh fruit or a lemony bar cookie—balances the hearty, creamy flavors.
Slow Cooker 4-Ingredient Chicken and Stuffing
Servings: 6

Ingredients
2 pounds boneless, skinless chicken breasts
2 (10.5-ounce) cans cream of chicken soup
1 1/2 cups low-sodium chicken broth
1 (6-ounce) box dry seasoned stuffing mix
Directions
Lightly grease the inside of a 5- to 6-quart slow cooker with cooking spray or a thin film of oil to help with cleanup and prevent sticking.
Place the boneless, skinless chicken breasts in a single layer on the bottom of the slow cooker. If the pieces are very thick, you can cut them in half crosswise so they cook more evenly and are easier to serve.
In a medium bowl, whisk together the cream of chicken soup and the chicken broth until the mixture is smooth and evenly combined. This creates the creamy, savory sauce that will keep both the chicken and stuffing moist.
Pour the soup-and-broth mixture evenly over the chicken breasts, making sure all of the chicken is covered in the sauce. Some of the liquid will pool around the chicken, which is what you want—it will help steam and braise the meat as it cooks.
Sprinkle the dry seasoned stuffing mix evenly over the top of the sauce-covered chicken. Do not stir. You want the stuffing to sit on top so it can absorb steam and some surface moisture while still forming a golden, slightly crisp layer in spots.
Cover the slow cooker with the lid and cook on LOW for 4 to 5 hours, or until the chicken is cooked through and tender (it should reach an internal temperature of 165°F and shred or slice easily) and the stuffing on top is soft, moist, and lightly golden around the edges.
Once cooked, use two forks to gently pull the chicken into large, rustic chunks right in the slow cooker, folding it just slightly into the creamy sauce while keeping most of the stuffing layer on top. This gives you tender pieces of chicken with a blanket of fluffy, savory stuffing.
Taste a bit of the sauce and stuffing and adjust the seasoning at the table if needed with a pinch of salt and freshly ground black pepper. Serve the chicken and stuffing hot, scooping down through the golden stuffing layer to capture some of the thick, creamy yellow sauce and tender chicken in every portion.
Variations & Tips
Because this recipe is built on four core ingredients, any variations should be thoughtful so you keep the spirit of a simple, cozy casserole. For a slightly richer flavor, swap one can of cream of chicken soup for cream of mushroom—this adds an earthier note without changing the process. If you prefer darker meat, you can use boneless, skinless chicken thighs in place of breasts; they stay especially juicy after several hours in the slow cooker. To encourage more browned, toasty bits in the stuffing, crack the slow cooker lid open slightly for the last 20–30 minutes of cooking, which lets some steam escape and dries the top just enough. If your stuffing looks a bit dry toward the end, drizzle in a few extra tablespoons of warm chicken broth around the edges (not over the entire top) to keep the texture moist and fluffy. For those cooking ahead, you can assemble the dish (chicken, sauce, and stuffing on top) in the insert, cover, and refrigerate up to 12 hours; let it sit at room temperature while you preheat the slow cooker, then cook as directed, adding up to 30 minutes to the total time if everything went in cold. Finally, if you like a little color when serving, garnish individual plates with chopped fresh parsley or chives—added at the end so they don’t count as a core ingredient in the base recipe but still bring a fresh contrast to the creamy, comforting casserole.

'Born from necessity': Just 5 ingredients. These disappear

by


 This simple southern fried dough is a true Depression-era classic—born from scarcity, but so good it never disappeared. With just five pantry staples, home cooks could turn a little flour and fat into something warm, crisp, and comforting that stretched to feed a family. You’ll see versions of this all over the South under different names: fried bread, hoecakes’ cousin, or just ‘fried dough.’ It’s the kind of recipe that doesn’t ask for much but delivers that nostalgic, fair-food-meets-front-porch feeling. You might want to make this when you’re low on ingredients, need a quick snack to go with coffee, or just want to taste a bit of culinary history that’s as practical as it is delicious.

These fried dough rounds are incredibly versatile. For a sweet bite, serve them warm with a dusting of powdered sugar, a drizzle of honey or sorghum, or a spoonful of jam. If you’re leaning savory, pair them with scrambled eggs, fried apples, or a bowl of beans and greens—collards, mustard greens, or turnip greens all work beautifully. They’re also excellent alongside a pot of vegetable soup or chili, standing in for cornbread when you want something a little different. And if you’re entertaining, cut them smaller and serve as a base for pulled pork, pimento cheese, or sliced country ham for a rustic appetizer.
Southern 5-Ingredient Depression-Era Fried Dough
Servings: 8–10 small pieces

Ingredients
2 cups all-purpose flour
2 teaspoons baking powder
1 teaspoon salt
3/4 to 1 cup water (enough to form a soft dough)
1/3 cup neutral oil or lard, for frying (plus more as needed)
Directions
In a medium bowl, whisk together the flour, baking powder, and salt so the leavening is evenly distributed. This helps the dough puff nicely in the hot fat.
Start by adding 3/4 cup of water to the dry ingredients. Stir with a spoon until a shaggy dough forms. If the mixture is still dry and floury, add additional water a tablespoon at a time until you have a soft, slightly tacky dough that holds together but isn’t runny.
Turn the dough out onto a lightly floured surface. Gently knead 6–8 times—just enough to bring it into a smooth ball. Over-kneading will make the fried dough tough instead of tender.
Pat or roll the dough into a rough circle about 1/4-inch thick. Depression-era cooks often skipped the rolling pin and simply used their hands. Cut into 8–10 pieces (triangles, squares, or rustic rounds all work).
Pour about 1/4 inch of oil or lard into a heavy skillet (cast iron works especially well) and heat over medium to medium-high heat until the fat shimmers. To test, drop in a small pinch of dough—it should sizzle steadily but not smoke.
Carefully lay a few pieces of dough into the hot fat, taking care not to crowd the pan. Fry on the first side for 2–3 minutes, or until golden brown and puffed in spots.
Flip and fry the second side for another 1–2 minutes, until evenly golden and cooked through. Adjust the heat as needed to keep the dough browning steadily without burning.
Transfer the fried dough to a plate lined with paper towels or a clean kitchen towel to drain. Repeat with remaining dough, adding a bit more oil to the pan if necessary and allowing it to reheat before continuing.
Serve warm, plain or with your choice of sweet or savory toppings. These are best eaten the day they’re made, ideally within an hour or two while the edges are still crisp.
Variations & Tips
Because this recipe is so minimal, it’s very forgiving and easy to adapt. For a slightly richer dough, replace a few tablespoons of the water with milk or buttermilk; the acidity in buttermilk will react with the baking powder and give you a bit more tenderness and lift. If you want a subtle sweetness, stir 1–2 tablespoons of sugar into the dry ingredients before adding water—this leans the dough toward dessert territory and pairs nicely with honey or jam. For a more rustic, hearty version, swap up to half of the all-purpose flour with cornmeal or whole-wheat flour; just be prepared to add a touch more water to reach a soft dough. You can also season the dough for savory applications: a teaspoon of onion powder, a pinch of black pepper, or a scattering of chopped green onions folded into the dough turns these into excellent companions for soups and beans. Historically, cooks would use whatever fat they had—lard, bacon drippings, or shortening—so feel free to experiment with different fats for flavor. To re-crisp leftovers, warm them in a dry skillet over medium heat for a minute or two on each side instead of microwaving, which can make them tough and chewy.

Tuesday, March 24, 2026

My sister passed down this 4 ingredient secret for when you want a rich hearty meal

by


 My sister taught me this little secret years ago, back when our kids were small and the days felt too short to fuss with chopping and simmering. She called it her “no-work Sunday supper” – just four humble ingredients layered in a pan and baked until it comes out bubbling, hearty, and smelling like you spent all afternoon in the kitchen. This oven baked 4-ingredient beef enchilada casserole isn’t authentic to any region of Mexico, but it’s very true to Midwestern farm kitchens: practical, filling, and meant to feed a hungry crowd with almost no prep work at all. You open a few packages, brown some meat, and let the oven do the rest.

I like to scoop this casserole into shallow bowls so all those layers of tortillas, saucy beef, and melted cheddar stay nestled together. It’s plenty filling on its own, but it plays nicely with simple sides: a crisp green salad with ranch dressing, a bowl of corn or green beans, or even some buttered canned corn if that’s what you have. Put out sour cream, jarred salsa, and a few sliced green onions if you want to dress it up a bit, and serve with tall glasses of iced tea or cold milk, just like we did on the farm after evening chores.
Oven Baked 4-Ingredients Beef Enchilada Casserole
Servings: 6

Ingredients
1 1/2 pounds ground beef
1 teaspoon salt (optional, to season the beef)
10 ounces red enchilada sauce (1 small can, mild or medium)
10–12 small corn tortillas (about 6-inch size)
3 cups shredded cheddar cheese
Directions
Preheat your oven to 375°F (190°C). Lightly grease a 9x13-inch baking dish; a white dish looks especially pretty with the red sauce and golden cheese.
Place a large skillet over medium-high heat. Add the ground beef and break it up with a spoon as it cooks. Cook until the beef is no longer pink and any liquid has mostly cooked off, about 7–10 minutes.
Season the cooked beef with the salt if using, then pour in the enchilada sauce. Stir well so all the meat is coated and the mixture is evenly saucy. Turn off the heat and let it sit while you get the tortillas and cheese ready.
Lay 5–6 corn tortillas in the bottom of the prepared baking dish, tearing a few if needed so you have a fairly even layer covering most of the surface.
Spoon half of the beef and sauce mixture over the tortillas, spreading it out to the edges. Sprinkle with about half of the shredded cheddar cheese, making a generous, even layer.
Add a second layer of corn tortillas over the cheese, again tearing as needed to mostly cover the surface. Top with the remaining beef and sauce mixture, spreading it evenly. Finish with the rest of the shredded cheddar cheese, covering the top well so it melts into a bubbly, golden blanket.
Cover the baking dish loosely with foil, tenting it slightly so it doesn’t stick to the cheese. Bake in the preheated oven for 15 minutes, then remove the foil and bake another 10–15 minutes, or until the casserole is hot all the way through and the cheese on top is melted and starting to brown around the edges.
Remove the casserole from the oven and let it rest for at least 10 minutes. This helps the layers set up so you can scoop out nice portions instead of everything sliding apart.
Serve warm, scooping down through all the layers so each serving has tortillas, saucy beef, and plenty of melted cheddar. Leftovers reheat well in the oven or microwave for easy meals later in the week.
Variations & Tips
This casserole is meant to be a no-prep, four-ingredient wonder, so I like to keep it simple. If you want to stretch it without adding much work, you can stir a drained can of black beans or corn into the beef and sauce before layering. For a little extra comfort, swap half the cheddar for Monterey Jack or Colby Jack, which melt very smoothly. If your family prefers a bit of heat, use medium or hot enchilada sauce and sharp cheddar; for a milder crowd, stick to mild sauce and a mild cheddar. You can also build this in smaller baking dishes to freeze in portions: assemble, cover tightly, and freeze unbaked, then thaw in the fridge and bake as directed, adding 10–15 minutes as needed. If corn tortillas aren’t your favorite, flour tortillas will work in a pinch, though they turn softer and more like a layered bake than a traditional enchilada; just keep the same simple four-ingredient idea so it stays true to the spirit of the recipe my sister passed down.

Nana Jean called this the little cake that fixes a long

by


This Amish-style sticky date pudding is the kind of little cake that quietly repairs a long day—warm, sticky, and usually gone in minutes. It’s a humble, pantry-friendly bake built on dates, flour, sugar, butter, eggs, and a touch of baking soda. Versions of this dessert have roots in old-fashioned American farmhouse kitchens and British sticky toffee pudding, but this one is simpler: everything bakes together in a single glass dish, forming a glossy caramel-brown top and a tender, moist crumb underneath. It’s the sort of recipe a Nana would pass down on a stained index card, meant to be made on an ordinary weeknight when you need something sweet and comforting without fuss.
Serve the pudding warm, scooped straight from the glass baking dish. A splash of cold heavy cream, a scoop of vanilla ice cream, or a dollop of lightly sweetened whipped cream plays nicely against the sticky, caramelized top. Strong coffee or hot tea balances the sweetness, while a small glass of milk makes it feel especially nostalgic. If you want to stretch it for a crowd, cut tidy squares and serve on small plates with extra warm sauce spooned over each piece.
Amish Sticky Date Pudding
Servings: 9

Ingredients
1 cup pitted dates, chopped
1 cup boiling water
1 teaspoon baking soda
1/2 cup (1 stick) unsalted butter, melted and slightly cooled
3/4 cup granulated sugar
2 large eggs, at room temperature
1 teaspoon vanilla extract
1 1/4 cups all-purpose flour
1 teaspoon baking powder
1/4 teaspoon fine salt
1/2 cup packed light brown sugar (for topping sauce)
1/4 cup unsalted butter (for topping sauce)
1/4 cup water or milk (for topping sauce)
Pinch of salt (for topping sauce)
Directions
Preheat your oven to 350°F (175°C). Lightly butter an 8x8-inch square glass baking dish, making sure to coat the corners so the pudding releases easily but still gets those nice sticky edges.
Prepare the dates: Place the chopped dates in a medium heatproof bowl. Pour the 1 cup of boiling water over the dates and sprinkle the 1 teaspoon baking soda on top. Stir gently and let the mixture sit for about 10 minutes. The dates will soften and the mixture will thicken slightly; this helps create that moist, almost pudding-like texture.
Mix the wet ingredients: In a large bowl, whisk together the melted 1/2 cup butter and the granulated sugar until the mixture looks glossy and slightly thickened. Add the eggs one at a time, whisking well after each addition, then whisk in the vanilla extract. You want everything fully combined but not over-beaten.
Combine the dry ingredients: In a separate small bowl, whisk together the flour, baking powder, and 1/4 teaspoon salt. This ensures the leavening is evenly distributed so the cake rises uniformly.
Build the batter: Stir the softened date mixture (including all the liquid) into the butter-sugar-egg mixture until evenly combined. The mixture may look a bit loose and speckled with dates—that’s exactly right. Gently fold in the flour mixture with a spatula just until no dry streaks remain. Overmixing can toughen the crumb, so stop as soon as it comes together.
Bake the pudding base: Pour the batter into the prepared glass baking dish and smooth the top. Bake on the center rack for 25–30 minutes, or until the top is set, shiny, and a toothpick inserted near the center comes out with a few moist crumbs but no wet batter. While it bakes, the dates will sink a bit and the edges will start to caramelize against the glass.
Make the sticky topping sauce: During the last 5–10 minutes of baking, combine the 1/2 cup brown sugar, 1/4 cup butter, 1/4 cup water or milk, and a pinch of salt in a small saucepan. Cook over medium heat, stirring frequently, until the butter melts and the mixture comes to a gentle simmer. Let it bubble for 1–2 minutes, stirring, until it looks smooth and glossy. Remove from heat; it will thicken slightly as it stands.
Finish the pudding: As soon as the cake comes out of the oven, poke it all over with a skewer or fork, going about halfway down into the cake. Slowly pour the warm brown sugar sauce evenly over the hot cake, letting it soak in and pool along the edges. The top will turn a deeper glossy caramel-brown as the sauce seeps into the crumb.
Rest briefly and serve: Let the pudding sit for at least 10–15 minutes to absorb the sauce and set up slightly. Serve warm, scooping or cutting squares straight from the glass dish. The edges should be sticky and caramelized, with a moist, tender interior that feels more like a soft pudding than a traditional cake.
Variations & Tips
For a slightly lighter texture, replace 1/4 cup of the all-purpose flour with finely ground oats or whole wheat pastry flour; it adds a bit of nuttiness without losing the sticky character. If you like a deeper caramel flavor, swap half of the granulated sugar in the batter for additional brown sugar. You can also add warm spices—1/2 teaspoon cinnamon and a pinch of nutmeg or cloves—to the dry ingredients for a more autumnal version. For a nutty twist, scatter 1/2 cup chopped toasted pecans or walnuts over the top right after you pour on the sauce, then let everything set together. If you need to make it ahead, bake the cake and keep it covered at room temperature, then rewarm gently in a low oven and heat the sauce just before serving. To reduce sweetness, thin the sauce with an extra tablespoon or two of water or milk and serve the pudding with unsweetened whipped cream to balance the richness.

Top Ad 728x90

Top Ad 728x90